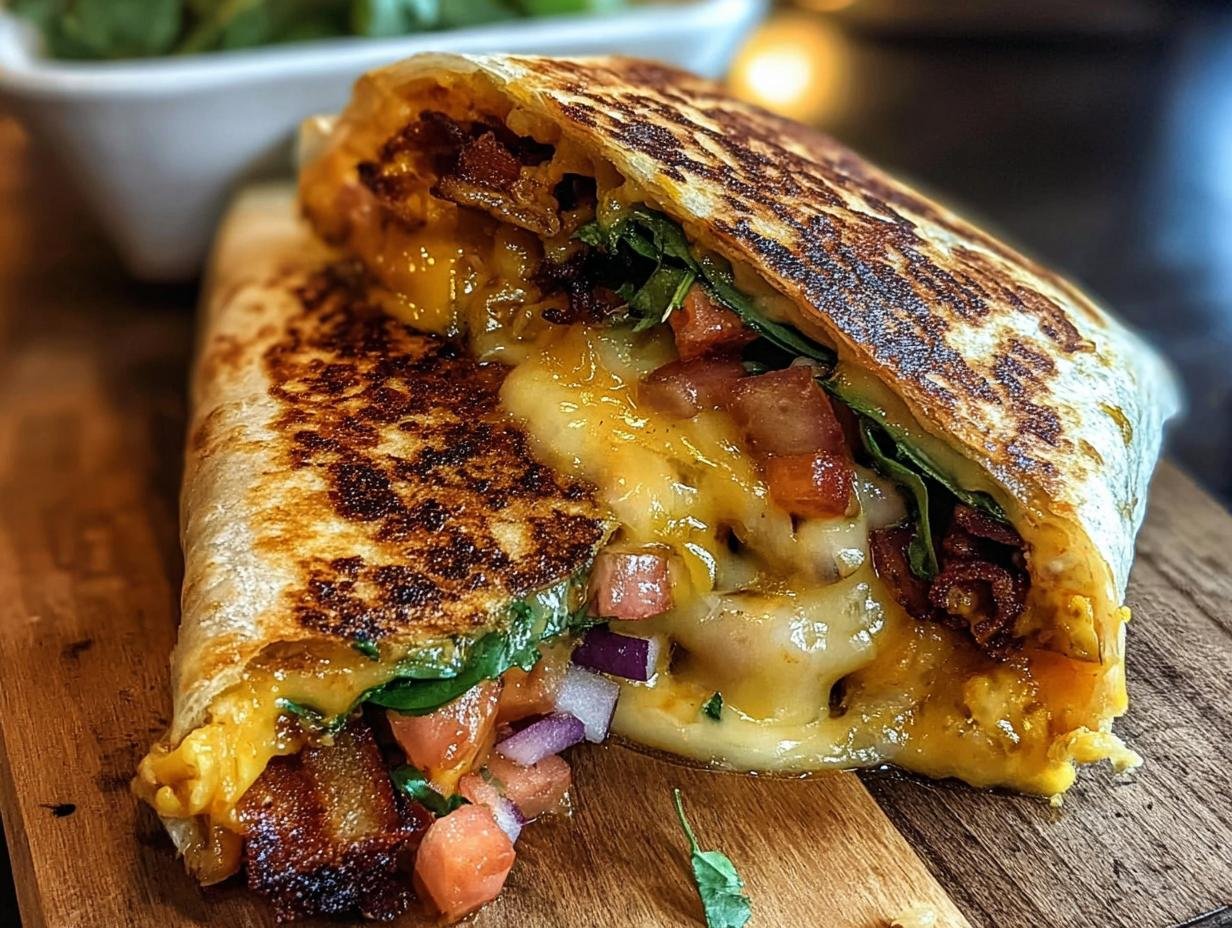
Grilled Cheese Burrito Comfort has become my go-to for a quick, satisfying meal that feels like a warm hug. I remember the first time I tried making one; I was craving something cheesy and familiar, and this fusion dish hit all the right notes. The smell of the butter sizzling on the tortilla, the way the cheese melts into gooey perfection, and that first crispy bite – it’s pure bliss. This isn’t just a meal; it’s an experience that brings together the best of both worlds. If you’re looking for that ultimate comfort food grilled cheese burrito that’s both easy and incredibly delicious, you’ve come to the right place. Let’s get this cheesy goodness cooking!
Why You’ll Love This Grilled Cheese Burrito Comfort
Get ready to fall in love with this incredible fusion dish. It’s so much more than just a meal; it’s a flavor explosion that’s perfect for any time of day.
- It’s incredibly easy to make, perfect for busy weeknights.
- You get that satisfyingly gooey, melted cheese pull every single time.
- It’s a truly comforting meal that feels like a warm embrace.
- The crispy, golden-brown tortilla adds amazing texture.
- This easy grilled cheese burrito is endlessly customizable to your taste.
- It offers a wonderfully savory grilled cheese burrito experience that’s simply unforgettable.
- It’s a fantastic way to satisfy those cheesy cravings.
- This dish is pure, unadulterated comfort food bliss.
Ingredients for Your Grilled Cheese Burrito
Gather these simple ingredients for a truly delicious and comforting meal. This easy grilled cheese burrito comes together in a flash, and the quality of your ingredients really shines through.
- 2 large flour tortillas – Burrito-sized ones work best for wrapping and grilling.
- 4 slices of your favorite cheese – I love a mix of sharp cheddar and Monterey Jack for that perfect melt and flavor.
- 2 tablespoons butter, divided – This is key for getting that golden-brown, crispy exterior.
- Optional: 2 tablespoons cooked and crumbled bacon – For a savory, smoky crunch.
- Optional: 2 tablespoons diced avocado – Adds a creamy texture and fresh flavor.
- Optional: 2 tablespoons salsa – For a tangy kick.
- Optional: 1 tablespoon pickled jalapeños, chopped – If you like a little heat!
How to Make a Grilled Cheese Burrito Recipe
Whipping up this amazing dish is surprisingly simple, and the results are pure cheesy perfection. Let’s get started on this delightful grilled cheese burrito recipe!
- Step 1: Prepare Your Fillings (Optional). If you’re adding extras, now’s the time! Cook any bacon until it’s nice and crispy, then crumble it. Dice your avocado and have your salsa and chopped pickled jalapeños ready to go. Having everything prepped makes the assembly a breeze, just like a good cheesy beef burrito recipe.
- Step 2: Butter the Tortillas. Take your two large flour tortillas and spread one tablespoon of butter evenly on one side of each. This buttered side is what will hit the skillet first, giving you that amazing golden-brown crust.
- Step 3: Start Grilling. Place one tortilla, butter-side down, into a large skillet or griddle set over medium-low heat. You want a gentle heat so the tortilla gets perfectly crisp without burning before the cheese melts.
- Step 4: Layer the Cheese and Fillings. Add two slices of your favorite cheese onto the tortilla in the skillet, covering most of the surface. Now, sprinkle your optional fillings like bacon, avocado, salsa, or jalapeños evenly over the cheese.
- Step 5: Add More Cheese and Top. Place the remaining two slices of cheese on top of your fillings. This extra layer of cheese is crucial for binding everything together and creating that gooey, melty center. Carefully place the second tortilla, butter-side up, on top of the cheese.
- Step 6: Grill and Flip. Grill this cheesy creation for about 3-5 minutes on the first side. You’re looking for a beautiful golden-brown color and the initial signs of melting cheese. Carefully flip the burrito over using a spatula.
- Step 7: Finish Grilling. Cook the second side for another 3-5 minutes, until it’s also golden brown and the cheese inside is completely melted and gloriously gooey. For an extra crispy, flatter result, you can gently press down with your spatula while it cooks. If your tortillas are browning too quickly, just reduce the heat slightly.
- Step 8: Rest and Serve. Remove the finished burrito from the skillet and place it on a cutting board. Let it rest for just a minute or two – this helps the cheese set slightly, making it easier to cut. Slice it in half or into wedges, and serve immediately to enjoy that hot, melty, crispy perfection.
Pro Tips for the Best Grilled Cheese Burrito Comfort
Want to elevate your grilled cheese burrito game? I’ve picked up a few tricks over the years that make all the difference in achieving that perfect, comforting bite.
- Use medium-low heat for grilling. This is crucial for allowing the cheese to melt completely before the tortilla gets too dark. Patience really pays off here!
- Don’t overstuff your burrito. Too many fillings can prevent the cheese from melting evenly and make it difficult to flip.
- Experiment with different cheese blends. A mix of sharp cheddar for flavor and Monterey Jack or mozzarella for meltiness is a winning combination.
- Butter the tortilla generously for the crispiest crust. Don’t be shy with the butter; it’s what gives you that golden-brown, delicious exterior.
What’s the secret to perfect Grilled Cheese Burrito Comfort?
The real secret to a perfect Grilled Cheese Burrito Comfort is the combination of buttering the outside of the tortilla and using medium-low heat. This ensures a golden, crispy shell while giving the cheese ample time to become wonderfully gooey. It’s the foundation of an ultimate cheesy burrito recipe.
Can I make a Grilled Cheese Burrito ahead of time?
You can definitely assemble your Grilled Cheese Burrito ahead of time! Prepare your fillings and assemble the burrito, but don’t grill it yet. Wrap it tightly in plastic wrap and refrigerate. When you’re ready to eat, just unwrap and grill as usual, though it might take a minute or two longer to heat through.
How do I avoid common mistakes with Grilled Cheese Burritos?
A common pitfall is using heat that’s too high, leading to a burnt tortilla and unmelted cheese. Another mistake is overfilling, which can make the burrito messy and hard to handle. Always ensure your cheese is layered well to create a good seal. For more on food safety, check out resources on proper handling of dairy products, like those from the FDA.
Best Ways to Serve Your Grilled Cheese Burrito
Serving this delightful creation is almost as fun as making it! To truly enhance that delicious cheesy burrito experience, consider a few perfect pairings. A simple side salad with a light vinaigrette offers a fresh contrast to the rich, cheesy burrito. For something heartier, a cup of tomato soup is a classic complement that just feels right, reminiscent of a traditional grilled cheese sandwich.
Don’t forget the dipping sauces! A dollop of cool sour cream, a spoonful of zesty salsa, or some creamy guacamole can take your grilled cheese burrito to the next level. These additions are fantastic for customizing each bite and making the whole meal even more satisfying.
Nutrition Facts for Grilled Cheese Burrito Comfort
When you’re enjoying this delightful Grilled Cheese Burrito Comfort, it’s helpful to know what you’re fueling up with. While exact figures can vary based on your cheese choices and optional fillings, here’s a general idea of what you can expect per serving.
- Calories: Approximately 550-650
- Fat: Around 30-40g
- Saturated Fat: Roughly 15-20g
- Protein: About 20-25g
- Carbohydrates: Approximately 45-55g
- Fiber: Around 3-5g
- Sugar: Typically 5-8g
- Sodium: Can range from 800-1200mg
Nutritional values are estimates and may vary based on specific ingredients used.
How to Store and Reheat Your Homemade Grilled Cheese Burrito
Even though this grilled cheese burrito comfort is best enjoyed fresh off the skillet, you can totally save some for later! Once your delicious creation has cooled down a bit, wrap it up snugly. For fridge storage, place the cooled burrito in an airtight container or wrap it tightly in plastic wrap and then foil. It should stay good for about 3 to 4 days. If you want to freeze it for longer, wrap it even more securely to prevent freezer burn – it can last up to 3 months this way.
When you’re ready to reheat, you have a few great options. The best way to bring back that crispy exterior is to pop it back into a skillet over medium-low heat for a few minutes per side, just like you made it. You can also reheat it in a toaster oven or a regular oven at around 350°F (175°C) for about 10-15 minutes, or until it’s heated through and the cheese is melty again. Microwaving works in a pinch, but you’ll miss out on that lovely crispiness.
Frequently Asked Questions About Grilled Cheese Burrito Comfort
What’s the best way to get a crispy grilled cheese burrito?
For that perfect crispy exterior, make sure you butter the outside of your tortilla generously and use medium-low heat. This allows the tortilla to crisp up and turn golden brown without burning before the cheese inside has a chance to melt completely. It’s a key step in mastering how to make a grilled cheese burrito.
Can I add meat to my grilled cheese burrito?
Absolutely! Adding cooked meat is a fantastic way to make your grilled cheese burrito comfort even more substantial. Cooked and crumbled bacon, seasoned ground beef, shredded chicken, or even chorizo work wonderfully. Just make sure the meat is cooked through and not too wet before adding it with your cheese layers.
What kind of cheese is best for a grilled cheese burrito?
The “best” cheese is really up to your preference, but a good melt is essential for that gooey factor! I love using a combination of sharp cheddar for flavor and Monterey Jack or pepper jack for creaminess and a little kick. Mozzarella also melts beautifully and gives a great cheese pull, making it a contender for the best grilled cheese burrito you can create.
How do I prevent my grilled cheese burrito from falling apart?
To ensure your burrito stays intact, don’t overstuff it, and make sure you have enough cheese to act as a binder. Layering cheese on both sides of your fillings helps hold everything together. Gently pressing with a spatula while it cooks also encourages the cheese to meld and seal the edges.
Variations of the Grilled Cheese Burrito You Can Try
Once you’ve mastered the classic, don’t be afraid to get creative! This dish is a fantastic canvas for all sorts of delicious twists. You can easily adapt it to suit your dietary needs or flavor preferences, ensuring there’s a version for everyone.
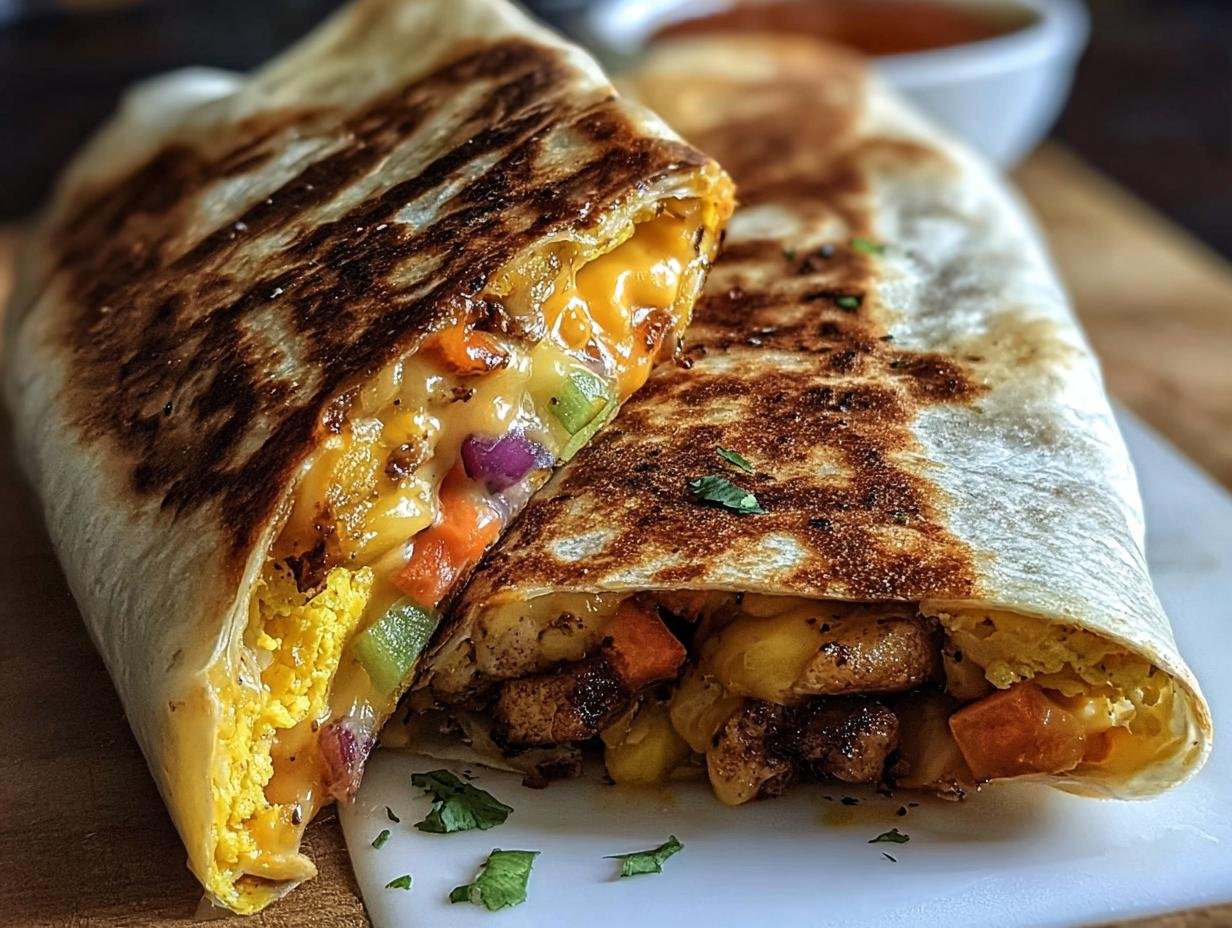
- Vegetarian Grilled Cheese Burrito: Skip the meat and load up on hearty plant-based fillings! Think black beans, corn, sautéed bell peppers and onions, or even seasoned tofu. It’s a incredibly satisfying meat-free option.
- Spicy Grilled Cheese Burrito: Craving a kick? Add a pinch of cayenne pepper to your cheese, mix in some chopped pickled jalapeños, or serve with a fiery hot sauce. A pepper jack cheese blend also adds a wonderful warmth to this comforting dish.
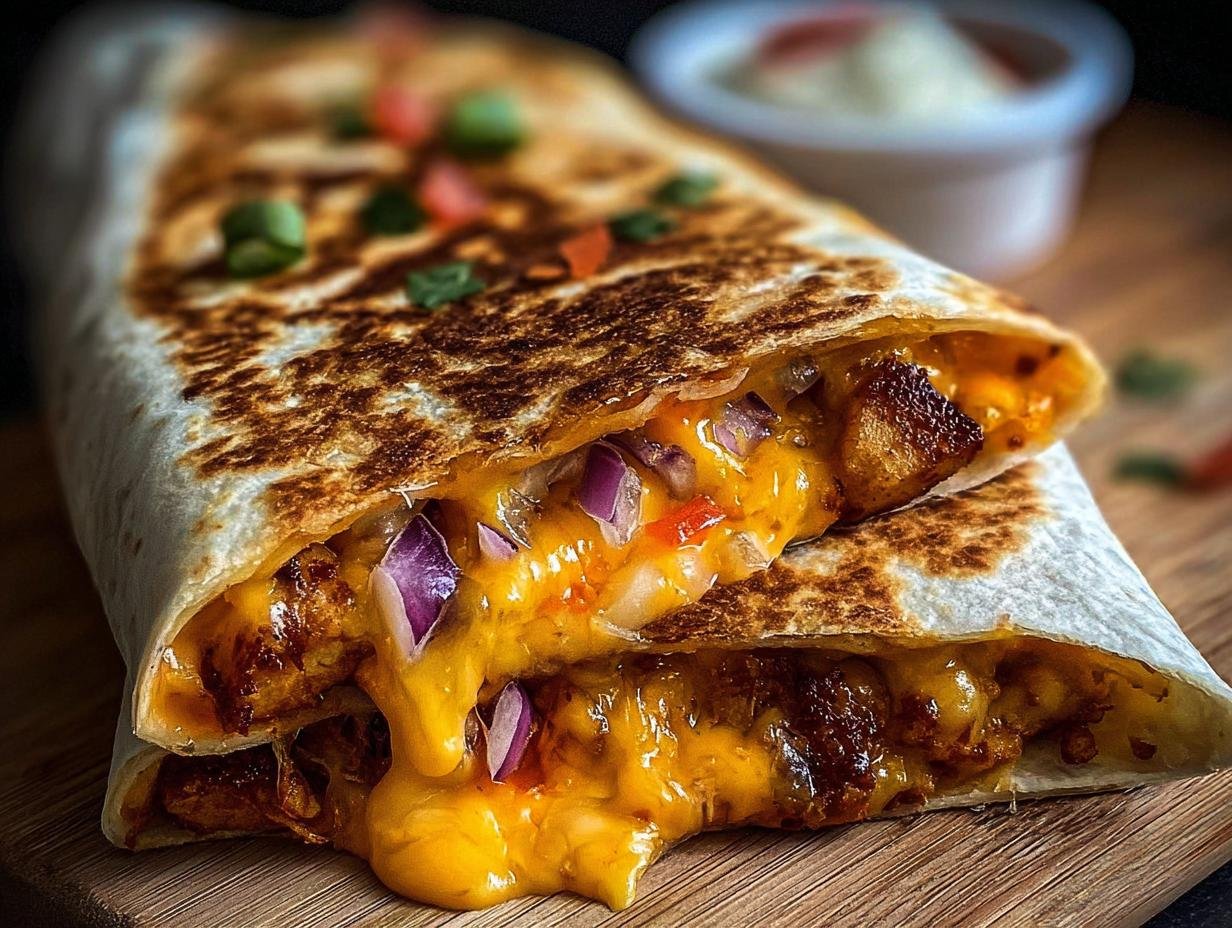
- Chicken or Beef Grilled Cheese Burrito: For a heartier meal, add leftover shredded chicken, seasoned ground beef, or even some savory chorizo into the cheesy layers. It transforms the simple burrito into a robust, flavor-packed delight.
- Baking Method: If you prefer not to use a skillet, you can assemble your burrito, wrap it in foil, and bake it at 350°F (175°C) for about 15-20 minutes, unwrapping it for the last 5 minutes to get some crispness.
Grilled Cheese Burrito: 1 Amazing Comfort

A delicious fusion of a classic grilled cheese sandwich and a hearty burrito, featuring melty cheese and your favorite fillings wrapped in a crispy, golden-brown tortilla. This comforting dish is easy to make and highly customizable.
- Prep Time: 5 minutes
- Cook Time: 10 minutes
- Total Time: 15 minutes
- Yield: 1 Burrito 1x
- Category: Lunch
- Method: Grilling
- Cuisine: American
- Diet: Vegetarian
Ingredients
- 2 large flour tortillas (burrito size)
- 4 slices of your favorite cheese (cheddar, Monterey Jack, pepper jack, or a combination)
- 2 tablespoons butter, divided
- Optional: 2 tablespoons cooked and crumbled bacon
- Optional: 2 tablespoons diced avocado
- Optional: 2 tablespoons salsa
- Optional: 1 tablespoon pickled jalapeños, chopped
Instructions
- Prepare your fillings (optional): Cook bacon until crispy, crumble, and set aside. Dice avocado. Have salsa and jalapeños ready.
- Butter one side of each tortilla evenly.
- Place one tortilla, butter-side down, in a large skillet or griddle over medium-low heat.
- Add two slices of cheese to the tortilla in the skillet, covering most of the surface.
- Sprinkle half of your optional fillings evenly over the cheese.
- Place the remaining two slices of cheese on top of the fillings.
- Carefully place the second tortilla, butter-side up, on top of the cheese.
- Grill the first side for 3-5 minutes, or until golden brown and cheese begins to melt.
- Carefully flip the burrito using a spatula.
- Grill the second side for another 3-5 minutes, or until golden brown and cheese is fully melted and gooey.
- Gently press down with a spatula while grilling for a flatter, crispier result (optional).
- Ensure the cheese is completely melted; reduce heat if tortillas brown too quickly.
- Remove the burrito from the skillet and place on a cutting board.
- Let cool slightly for 1-2 minutes before cutting.
- Cut the burrito in half or into wedges.
- Serve immediately while hot and gooey.
- Consider serving with dipping sauces like salsa, sour cream, or guacamole.
Notes
- Experiment with different cheese combinations for varied flavors.
- Add cooked shredded chicken, ground beef, or chorizo for a heartier meal.
- For a vegetarian option, include black beans, corn, or sautéed bell peppers and onions.
- Add cayenne pepper or hot sauce for a spicy kick.
- Try a thin layer of fig jam or apple butter for a sweet and savory twist.
- Burritos can be assembled up to 24 hours ahead and refrigerated.
- A grill pan can be used as an alternative to a skillet.
- For an oven-baked option, assemble, wrap in foil, and bake at 350°F (175°C) for 15-20 minutes, removing foil for the last 5 minutes.
- Leftovers can be stored for up to 3 days and reheated.
- Cook burritos in batches to avoid overcrowding the skillet for even browning.
- Use a non-stick skillet for easier flipping.
- Adjust heat as needed during cooking. Be patient for best results.
Nutrition
- Serving Size: 1 Burrito
- Calories: Not Specified
- Sugar: Not Specified
- Sodium: Not Specified
- Fat: Not Specified
- Saturated Fat: Not Specified
- Unsaturated Fat: Not Specified
- Trans Fat: Not Specified
- Carbohydrates: Not Specified
- Fiber: Not Specified
- Protein: Not Specified
- Cholesterol: Not Specified


Leave a Reply