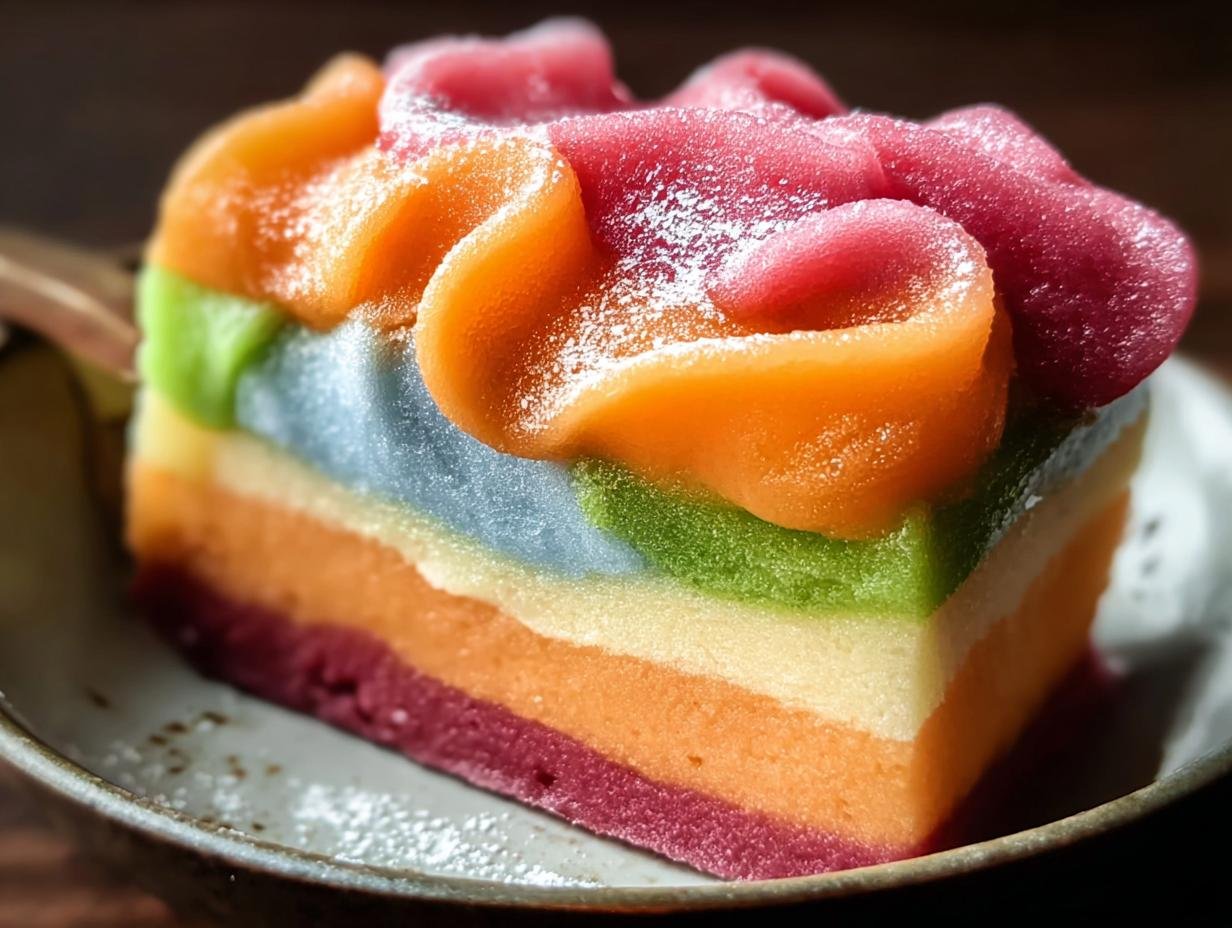
Rainbow sorbet has always been my go-to for a burst of pure joy on a hot summer day. I remember my mom making a vibrant, layered version for my birthday parties as a kid, and the sheer delight of seeing those bright colors swirl together was magical. This recipe is my take on that cherished memory, an easy rainbow sorbet that’s bursting with fresh fruit flavors and so simple to whip up. It’s truly a showstopper and a wonderfully colorful sorbet dessert that will have everyone asking for seconds. Let’s get cooking!
Why You’ll Love This Rainbow Sorbet
This homemade rainbow sorbet is a winner for so many reasons:
- Incredible Taste: It’s bursting with bright, fruity flavors that are perfectly sweet and refreshing.
- Quick Prep Time: With minimal hands-on work, you can have this dessert ready to chill in under 30 minutes.
- Healthier Choice: Made with real fruit, it’s a lighter, more natural frozen treat compared to many ice creams.
- Budget-Friendly: Using common pantry staples and fresh fruit makes this a cost-effective indulgence.
- Family Favorite: The vibrant colors and delicious taste are a guaranteed hit with kids and adults alike.
- Customizable: You can easily swap out fruits to create your own unique flavor combinations.
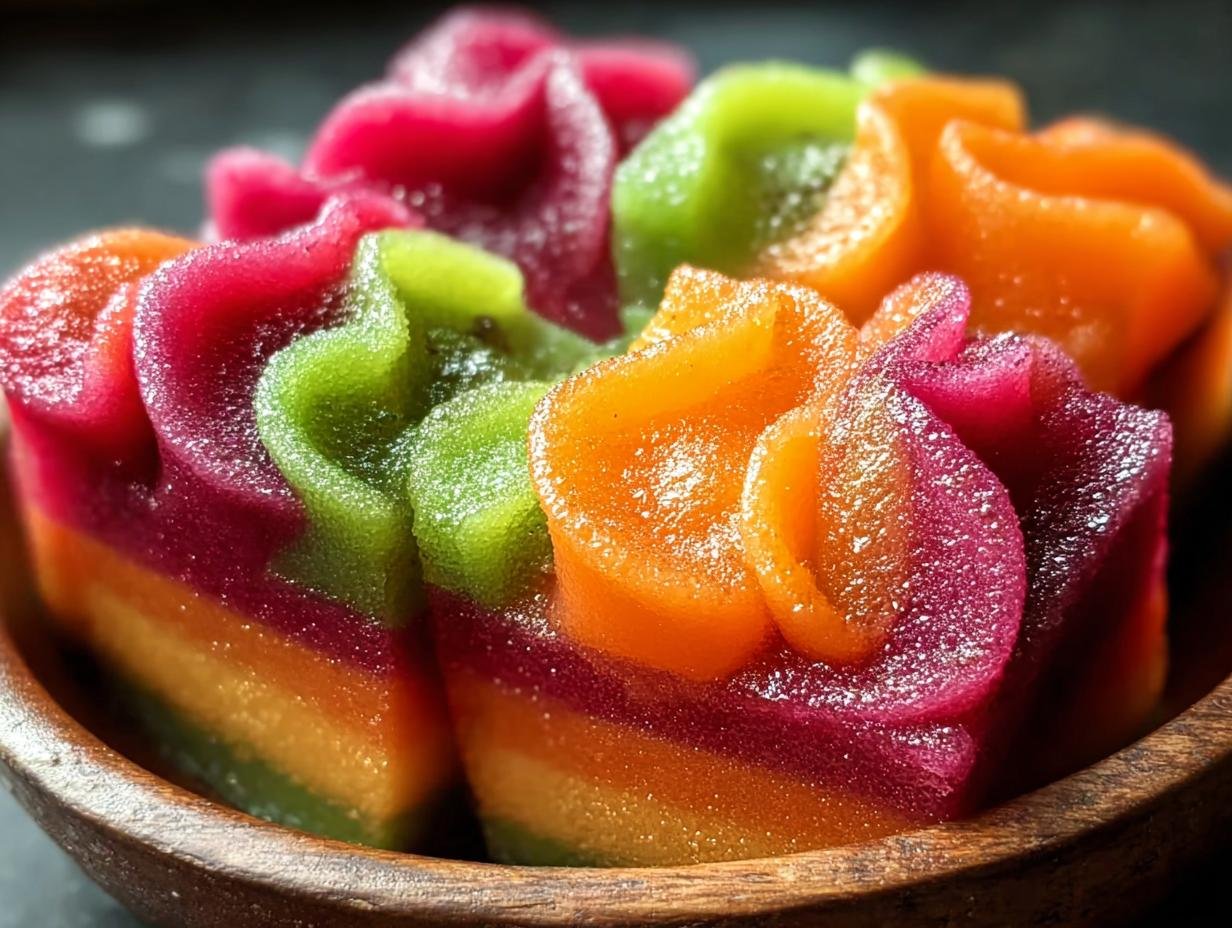
- Impressive Presentation: This homemade rainbow sorbet looks as amazing as it tastes, perfect for parties.
Rainbow Sorbet Ingredients
Gathering these rainbow sorbet ingredients is the first step to creating this delightful dessert. The base is crucial for that creamy texture, so we’ll use 1 cup heavy cream and 1 cup whole milk for richness. Sweetness comes from 3/4 cup granulated sugar. For that signature fruity punch, we’ll need 2 cups raspberries, 1/2 cup orange juice, and 1/4 cup lime juice. Don’t forget the bright flavors from 1 tablespoon orange zest and 1 teaspoon lime zest. If you want even more vibrant colors, a few drops of food coloring like orange food coloring (optional) and green food coloring (optional) can be added, though the fruit itself provides a beautiful natural hue.
How to Make Rainbow Sorbet
Now that you have your ingredients ready, let’s dive into how to make rainbow sorbet! This process is surprisingly straightforward and yields a truly spectacular dessert. We’ll start by creating a luscious base, then prepare our vibrant fruit layers, and finally bring it all together in your ice cream maker for that perfect, scoopable consistency. Get ready to create a stunning frozen treat!
Making the Sorbet Base
First, we need to prepare the creamy base. In a saucepan over medium heat, combine the 1 cup heavy cream, 1 cup whole milk, and 3/4 cup granulated sugar. Stir gently for about 5-7 minutes until the sugar is completely dissolved and the mixture is warm to the touch, but not boiling. Remove it from the heat and stir in the 1 teaspoon vanilla extract. Let this mixture cool down, then pour it into a sealed container and pop it in the refrigerator. It needs to chill thoroughly for at least 2 hours, or even better, overnight.
Creating the Fruit Layers
While our base is chilling, we’ll create the vibrant fruit layers for our homemade rainbow sorbet. For the raspberry layer, combine 2 cups raspberries with 2 tablespoons of sugar in a blender. Blend until it’s super smooth. Then, press this puree through a fine-mesh sieve into a bowl to catch all those seeds, leaving you with a silky smooth raspberry mixture. Set this aside. You’ll repeat a similar process for the other fruit flavors, like the orange and lime, using their respective juices and zests to create distinct flavor profiles.

Churning and Layering
Once your base is perfectly chilled, it’s time to churn it! Pour the cold base into your ice cream maker and follow the manufacturer’s instructions. This usually takes about 20-25 minutes until it reaches a soft-serve consistency. Now for the fun part of how to make rainbow sorbet! Divide the churned base into three separate bowls. Mix the raspberry puree into one-third, the orange juice and zest into another, and the lime juice and zest into the last. Gently stir each flavor into its respective portion. Finally, in a freezer-safe container, alternate spoonfuls of each flavor, creating those beautiful swirls. Cover it tightly and freeze for 4-6 hours until firm.
Pro Tips for the Best Rainbow Sorbet
Achieving that perfect scoop of homemade rainbow sorbet is easier than you think with a few insider tricks. These tips will help ensure your sorbet is vibrant, flavorful, and has the ideal texture every time. Don’t be intimidated by the layers; it’s all about patience and enjoying the process!
- Chill Everything Thoroughly: Make sure your sorbet base is completely cold before churning. This is key for a smooth, creamy texture and helps the ice cream maker work efficiently.
- Strain Your Fruit Purees: For a silky-smooth sorbet, always strain your fruit purees through a fine-mesh sieve. This removes seeds and pulp, ensuring a pleasant mouthfeel.
- Don’t Overmix the Flavors: When adding the fruit purees to the churned base, mix just until combined. Overmixing can muddy the colors and textures.
- Layer with Care: Alternate spoonfuls of each flavor into your freezer container. This creates those beautiful, distinct swirls that make this such a visually stunning dessert.
What’s the secret to perfect layered rainbow sorbet?
The secret to a truly perfect layered rainbow sorbet lies in the chilling of the base and not over-mixing the fruit purees into the churned mixture. Gentle layering is key for those distinct color bands.
Can I make rainbow sorbet ahead of time?
Absolutely! You can prepare the sorbet base up to 24 hours in advance and keep it chilled. Once churned and layered, the finished sorbet can be frozen for up to 3 months. Just ensure it’s stored in an airtight container.
How do I avoid common mistakes with homemade rainbow sorbet?
A common mistake is not chilling the base enough, which results in a slushy texture. Also, overmixing the fruit purees can ruin the layered effect. Always strain your fruit for the smoothest result.
Best Ways to Serve Rainbow Sorbet
This vibrant rainbow sorbet is a showstopper on its own, but serving it creatively can elevate it even further! For a truly stunning presentation, try scooping generous portions into chilled glasses or small bowls, highlighting those beautiful fruit layers. It’s also a fantastic addition to other desserts. Consider it as a refreshing counterpoint to rich chocolate cake or a warm berry crumble with fresh berries – these sorbet dessert ideas really bring out the brightness of the sorbet. You could even serve it alongside fresh berries or a light whipped cream for a simple yet elegant treat that everyone will adore.
Nutrition Facts for Rainbow Sorbet
This delightful rainbow sorbet offers a burst of flavor with a reasonable nutritional profile, making it a fantastic treat. Per serving, you’re looking at a wonderfully refreshing dessert that doesn’t weigh you down. These values are based on a standard scoop and can vary slightly depending on the specific fruits and sweeteners you use for your homemade rainbow sorbet.
- Calories: 180 kcal
- Fat: 6 g
- Saturated Fat: 4 g
- Protein: 2 g
- Carbohydrates: 30 g
- Fiber: 1 g
- Sugar: 25 g
- Sodium: 50 mg
Nutritional values are estimates and may vary based on specific ingredients used.
How to Store and Reheat Rainbow Sorbet
Properly storing your beautiful homemade rainbow sorbet is key to enjoying it later. Once your sorbet is fully frozen and firm, transfer it to an airtight, freezer-safe container. Pressing a piece of parchment paper or plastic wrap directly onto the surface before sealing helps prevent ice crystals from forming. This way, you can keep your vibrant dessert in the freezer for up to 3 months and still have that amazing flavor. While you can’t really “reheat” sorbet in the traditional sense, if it gets too hard, just let it sit at room temperature for a few minutes until it reaches a perfectly scoopable consistency again. This ensures your colorful sorbet dessert is always ready when a craving strikes!
Frequently Asked Questions About Rainbow Sorbet
What is rainbow sorbet?
Rainbow sorbet is a delightful frozen dessert made from fruit purees, sugar, and water, giving it a vibrant, layered appearance and a refreshing, fruity taste. Unlike ice cream, it’s typically dairy-free and churned to a lighter, icier texture. It’s a wonderful way to enjoy a spectrum of flavors in one treat. For more information on frozen desserts, you can explore food science.
Can I make rainbow sorbet without an ice cream maker?
Yes, you can! While an ice cream maker gives the smoothest texture, you can achieve a good result by freezing the base mixture in a shallow pan, stirring vigorously with a fork every 30-45 minutes for about 3-4 hours to break up ice crystals. Then, layer in your fruit purees and freeze until firm.
What fruits are best for rainbow sorbet?
The best fruits for rainbow sorbet are those with bright colors and intense flavors. Berries like raspberries, strawberries, and blueberries work wonderfully. Citrus fruits like oranges, lemons, and limes add a lovely tang. Peaches, mangoes, and kiwi are also excellent choices for creating a beautiful and delicious spectrum of flavors. For more on fruit, check out gardening tips.
How do I get distinct layers in my rainbow sorbet?
To get distinct layers in your homemade rainbow sorbet, ensure each fruit flavor is chilled before layering it into the freezer container. Alternate spoonfuls of each color, rather than pouring them all in at once. This helps keep the colors separate and creates that stunning visual effect that defines a great layered rainbow sorbet.
Variations of Rainbow Sorbet You Can Try
Once you’ve mastered the basic rainbow sorbet, the possibilities for customization are endless! You can easily adapt this recipe to suit different dietary needs or explore new flavor combinations. For a truly refreshing twist, consider a dairy-free rainbow sorbet by simply omitting the cream and milk from the base and using a simple syrup made from sugar and water instead. This still yields a wonderfully bright and fruity dessert. If you’re aiming for a completely plant-based option, this recipe is already very close, but a fully vegan rainbow sorbet can be achieved by ensuring all ingredients, including any added sweeteners, are vegan-approved. Experiment with tropical fruits like mango and pineapple, or add a hint of mint for an extra layer of freshness. This versatile recipe is perfect for creating your own signature colorful sorbet dessert!
PrintRainbow Sorbet: 1 Magical Frozen Treat

This Homemade Rainbow Sherbet recipe offers a refreshing and colorful frozen treat made with real fruit flavors. It’s easy to prepare, customizable, and perfect for any occasion.
- Prep Time: 20 minutes
- Cook Time: 7 minutes
- Total Time: 2 hours 27 minutes
- Yield: 6 scoops 1x
- Category: Dessert
- Method: Ice Cream Maker
- Cuisine: American
- Diet: Vegetarian
Ingredients
- For the Base:
- 1 cup Heavy Cream
- 1 cup Whole Milk
- 3/4 cup Granulated Sugar
- 1 teaspoon Vanilla Extract
- For the Flavors:
- 2 cups Raspberries
- 1/2 cup Orange Juice
- 1 tablespoon Orange Zest
- 1/4 cup Lime Juice
- 1 teaspoon Lime Zest
- a few drops Food Coloring (orange) (optional)
- a few drops Food Coloring (green) (optional)
Instructions
- Prepare the Base: In a saucepan over medium heat, combine heavy cream, whole milk, and granulated sugar. Stir continuously for about 5-7 minutes, until the sugar dissolves and the mixture is warm. Remove from heat and stir in vanilla extract. Allow the base to cool, then transfer to a sealed container and refrigerate until chilled, at least 2 hours.
- Create Raspberry Puree: While the base is chilling, combine raspberries with 2 tablespoons of sugar in a blender and blend until completely smooth. Strain the puree through a fine-mesh sieve into a bowl, discarding any seeds. Set aside.
- Churn Base: Once the base mixture is thoroughly chilled, pour it into your ice cream maker. Following the manufacturer’s instructions, churn the mixture until it reaches a soft-serve consistency, typically around 20-25 minutes.
- Flavor Variations: Divide the churned base into three equal parts in separate bowls. Mix the reserved raspberry puree into one-third of the base and churn for another minute. In the second bowl, add orange juice, zest, and orange food coloring to the second third, stirring gently. In the last bowl, mix lime juice, zest, and green food coloring into the last third, blending until smooth.
- Layer and Freeze: In a freezer-safe container, use a large spoon to alternate layers of each flavor, creating a marbled effect. Cover the container tightly and freeze for 4-6 hours, or until it is fully hardened and scoopable.
Notes
- Ensure the base is completely chilled before churning for a smooth, creamy texture.
- Straining fruit purees prevents seeds from affecting the sherbet’s texture.
- Use fresh, ripe fruit for the best flavor.
- Feel free to experiment with other fruits and herbs.
- Layer colors thoughtfully for visual appeal.
Nutrition
- Serving Size: 1 scoop
- Calories: 180 kcal
- Sugar: 25 g
- Sodium: 50 mg
- Fat: 6 g
- Saturated Fat: 4 g
- Unsaturated Fat: 1 g
- Trans Fat: 0 g
- Carbohydrates: 30 g
- Fiber: 1 g
- Protein: 2 g
- Cholesterol: 30 mg


Leave a Reply