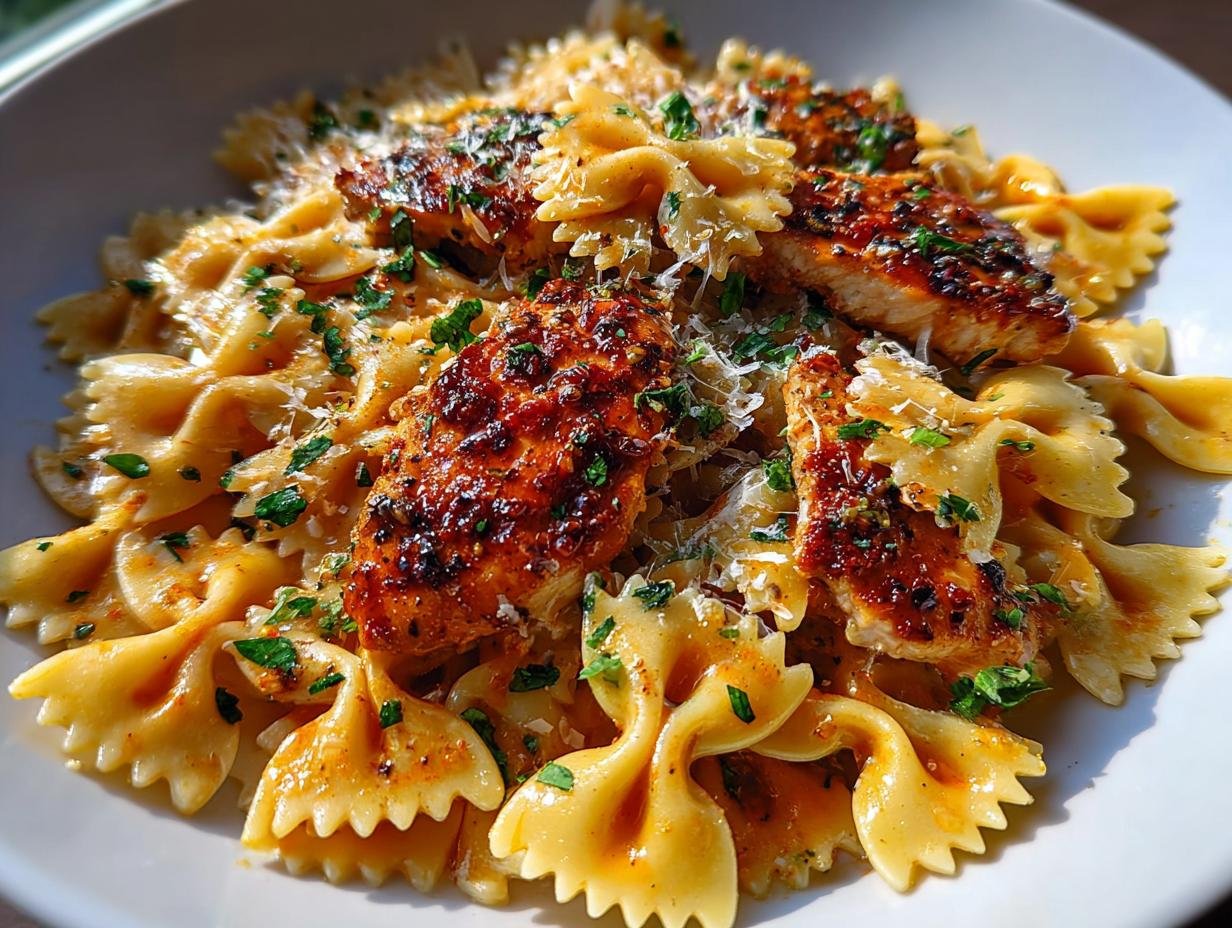
Cheesy bowtie pasta garlic has become my go-to for a quick weeknight meal, and I think you’re going to love it too! I first stumbled upon this amazing garlic cheesy bowtie pasta recipe when I was in a pinch for time, and the aroma that filled my kitchen was incredible – rich garlic, savory parmesan, and that comforting cheesy goodness. The tender chicken and perfectly cooked pasta coated in that luscious sauce are just divine. It’s a truly satisfying dish that feels fancy but is surprisingly simple to whip up. Let’s get cooking!
Why You’ll Love This Cheesy Bowtie Pasta Garlic
This dish is a weeknight hero for so many reasons!
- It’s incredibly quick, ready in just 30 minutes.
- The sauce is wonderfully creamy and packed with garlic flavor.
- It’s an easy cheesy bowtie pasta garlic meal that even beginners can master.
- The combination of tender chicken and perfectly cooked pasta is incredibly satisfying.
- You get that delightful creamy garlic bowtie pasta cheese texture in every bite.
- It’s a crowd-pleaser that even picky eaters will devour.
- Minimal cleanup means more time enjoying your meal.
- It’s a versatile dish that can be customized with your favorite veggies.
Ingredients for Cheesy Bowtie Pasta Garlic
Gathering these simple cheesy garlic bowtie pasta ingredients is the first step to an amazing meal. I love how approachable this recipe is, using pantry staples and fresh ingredients to create something truly special.
- 8 oz bowtie pasta – also known as farfalle, these little bows hold sauce beautifully.
- 2 boneless, skinless chicken breasts – about 6-8 oz each, cut into bite-sized pieces.
- 1/2 cup grated parmesan cheese – use freshly grated for the best melt and flavor.
- 3 cloves garlic, minced – the star of our flavor! Don’t be shy with the garlic.
- 1 cup heavy cream – this makes our sauce rich and luscious.
- 1/2 cup shredded mozzarella cheese – for that extra gooey, cheesy pull.
- 2 tbsp butter – the base for sautéing our garlic and building the sauce.
- 1 tbsp olive oil – helps prevent the butter from burning and adds a fruity note.
- 1 tsp Italian seasoning – a blend of herbs for classic Italian flavor.
- Salt and pepper to taste – essential for bringing out all the flavors.
- Fresh parsley for garnish (optional) – adds a pop of color and freshness to the finished garlic cheesy pasta bow ties.
How to Make Cheesy Bowtie Pasta Garlic
Let’s get this delicious meal on the table! Making this cheesy bowtie pasta garlic is so straightforward, and the results are always impressive. You’ll be amazed at how quickly you can create a restaurant-quality dish right in your own kitchen.
- Step 1: Start by getting your pasta water ready. Bring a large pot of generously salted water to a rolling boil. Add 8 oz bowtie pasta and cook according to package directions until it’s perfectly al dente, usually about 9 minutes. While that’s going, you can prep your chicken.
- Step 2: While the pasta cooks, heat 1 tbsp olive oil in a large skillet over medium-high heat. Make sure your skillet is nice and hot before adding the chicken.
- Step 3: Season your chicken breasts (about 6-8 oz each) with salt, pepper, and 1 tsp Italian seasoning. Carefully place the seasoned chicken into the hot skillet. Cook for about 6-7 minutes per side until it’s beautifully golden brown and cooked through. The internal temperature should reach 165°F (74°C). Once cooked, remove the chicken from the skillet and let it rest on a cutting board for a few minutes before slicing it into bite-sized pieces. This resting step is crucial for juicy chicken!
- Step 4: Reduce the skillet heat to medium-low. Melt 2 tbsp butter in the same skillet where you cooked the chicken. Add the 3 cloves minced garlic and sauté for about 30 seconds until you can really smell that amazing garlicky aroma. Be careful not to burn the garlic!
- Step 5: Pour in the 1 cup heavy cream and bring it to a gentle simmer. Gradually whisk in the 1/2 cup grated parmesan cheese until it’s completely melted and the sauce is smooth and creamy. Then, stir in the 1/2 cup shredded mozzarella cheese until it’s fully incorporated and the sauce is wonderfully gooey. This is where the magic happens for our garlic cheesy bowtie pasta!
- Step 6: Drain your cooked bowtie pasta and add it directly to the skillet with the luscious sauce. Add the sliced chicken back into the skillet as well. Toss everything gently with tongs until the pasta and chicken are thoroughly coated in the creamy garlic parmesan sauce. This step is key to achieving that perfect garlic parmesan bowtie pasta bake consistency, even though we’re not baking it!
- Step 7: Taste your creation and adjust the seasoning with more salt and pepper if needed. For an extra touch of freshness and color, garnish with chopped fresh parsley, if you have it. Serve your incredible how to make cheesy bowtie pasta garlic dish immediately and enjoy every cheesy, garlicky bite!
Pro Tips for the Best Cheesy Bowtie Pasta Garlic
Want to elevate your cheesy bowtie pasta garlic game? I’ve picked up a few tricks that make all the difference!
- Don’t overcook your pasta! It will continue to cook slightly in the hot sauce, so aim for al dente.
- For an even richer sauce, you can toast your garlic in the butter for a minute longer, but watch it closely to prevent burning.
- If you prefer a thicker garlic cheesy pasta bow ties sauce, let it simmer for an extra minute or two after adding the cream and cheese.
What’s the secret to perfect Cheesy Bowtie Pasta Garlic?
The secret really lies in building layers of flavor and not overcooking anything. Using fresh garlic and good quality parmesan cheese makes a huge difference for the best cheesy bowtie pasta garlic recipe. Also, letting the chicken rest ensures it stays super juicy!
Can I make Cheesy Bowtie Pasta Garlic ahead of time?
Yes, you can prep components ahead! You can cook the chicken and pasta separately and store them in the fridge. The sauce can also be made ahead. When ready to serve, reheat the sauce, then toss everything together. It won’t be quite as fresh, but it’s a great meal prep option.
How do I avoid common mistakes with Cheesy Bowtie Pasta Garlic?
A common pitfall is burning the garlic; sauté it gently over low heat. Another mistake is making the sauce too thin. If it happens, just simmer it a bit longer with the cheese to thicken. Finally, don’t skip resting the chicken – it keeps it tender!
Best Ways to Serve Cheesy Bowtie Pasta Garlic
This creamy, garlicky pasta is fantastic on its own, but it also shines when paired with a few simple additions. It truly is the perfect cheesy bowtie pasta garlic side dish for any occasion. For a complete meal, I love serving it alongside a crisp green salad with a light vinaigrette. The freshness cuts through the richness of the pasta beautifully.
Another great option is some crusty garlic bread. It’s perfect for soaking up any extra bits of that delicious cheesy sauce left on your plate. If you’re looking for something a bit more substantial, grilled or roasted asparagus or steamed broccoli also make wonderful companions, adding a touch of green and a healthy element to your dinner.
Nutrition Facts for Cheesy Bowtie Pasta Garlic
Here’s a breakdown of what you can expect in a serving of this delicious cheesy bowtie pasta garlic dish:
- Calories: 520
- Fat: 28g
- Saturated Fat: 15g
- Protein: 32g
- Carbohydrates: 38g
- Fiber: 2g
- Sugar: 3g
- Sodium: 450mg
Nutritional values are estimates and may vary based on specific ingredients used in your garlic cheesy bowtie pasta recipe. For more information on healthy eating, check out resources on nutritional powerhouses.
How to Store and Reheat Cheesy Bowtie Pasta Garlic
Even though this cheesy bowtie pasta with garlic and cheese is best enjoyed fresh, I know life gets busy! If you have leftovers, don’t toss them. Allow the pasta to cool completely before storing. The best way to keep it fresh is in an airtight container. You can store it in the refrigerator for up to 3-4 days. For longer storage, this dish freezes surprisingly well! Wrap individual portions tightly in plastic wrap, then in foil, and pop them in the freezer for up to 3 months. When you’re ready to reheat, frozen portions should be thawed overnight in the refrigerator first.
To reheat, gently warm it in a skillet over low heat, stirring frequently. You might want to add a splash of milk or cream to help loosen the sauce. Alternatively, you can microwave it in 30-second intervals, stirring between each, until heated through. Enjoy your delicious, revived meal!
Frequently Asked Questions About Cheesy Bowtie Pasta Garlic
What is Cheesy Bowtie Pasta Garlic?
Cheesy bowtie pasta garlic is a delicious and comforting dish that features bowtie pasta tossed in a creamy, cheesy sauce infused with garlic. It often includes protein like chicken or can be made as a vegetarian dish. It’s known for its rich flavor and satisfying texture, making it a popular choice for a quick weeknight meal or a family dinner.
Can I make Cheesy Bowtie Pasta Garlic vegetarian?
Absolutely! To make this a fantastic cheesy bowtie pasta garlic vegetarian meal, simply omit the chicken. You can boost the flavor and texture by adding sautéed mushrooms, spinach, sun-dried tomatoes, or roasted bell peppers. This variation is just as delicious and satisfying, offering a wonderful plant-based option. For more vegetarian ideas, explore our recipe section.
How do I make the sauce creamier for my Cheesy Bowtie Pasta Garlic?
For an extra creamy sauce, ensure you use good quality heavy cream and don’t boil it vigorously after adding the cheese. Gently simmering and whisking until the cheeses melt creates a smooth emulsion. Some people also add a tablespoon of cream cheese along with the mozzarella for an even richer, smoother consistency in their garlic cheesy bowtie pasta dinner.
What is the best way to reheat Cheesy Bowtie Pasta Garlic?
The best way to reheat this dish is gently on the stovetop over low heat with a splash of milk or cream to help loosen the sauce and prevent it from becoming oily or clumpy. You can also microwave it, but be sure to stir it every 30 seconds to ensure even heating and to maintain that lovely creamy texture. Avoid high heat, which can cause the sauce to separate.
Variations of Cheesy Bowtie Pasta Garlic You Can Try
This versatile dish is fantastic as is, but I love experimenting with it! There are so many ways to customize this cheesy bowtie pasta garlic to suit your tastes or dietary needs. For a heartier meal, you can easily adapt it into a cheesy bowtie pasta garlic chicken recipe by adding grilled chicken strips or even sautéed chicken sausage. If you’re looking for a dish with a similar pasta style, you might enjoy our spaghetti with mushroom sauce.
If you’re looking for a meatless option, this recipe is perfect for a delicious cheesy bowtie pasta garlic vegetarian meal. Simply omit the chicken and consider adding some sautéed mushrooms, spinach, or roasted red peppers for extra flavor and texture. You could also try a baked version; just transfer the finished pasta to a baking dish, top with extra cheese, and bake until bubbly! For another great pasta dish, check out this spaghetti with garlic and oil.
For a complete meal experience, consider pairing this dish with a simple Caprese salad or some crusty bread. The combination of flavors and textures makes for a truly satisfying meal. If you’re interested in learning more about the importance of fresh ingredients, you might find our article on cherry tomatoes insightful.
PrintCheesy Bowtie Pasta Garlic: 30 Min Meal
A quick and delicious weeknight meal featuring tender chicken in a creamy garlic parmesan sauce tossed with bowtie pasta. This dish is ready in 30 minutes, making it perfect for busy evenings.
- Prep Time: 10 minutes
- Cook Time: 20 minutes
- Total Time: 30 minutes
- Yield: 4 servings 1x
- Category: Dinner
- Method: Stovetop
- Cuisine: Italian-American
- Diet: Vegetarian
Ingredients
- 8 oz bowtie pasta
- 2 boneless, skinless chicken breasts
- 1/2 cup grated parmesan cheese
- 3 cloves garlic, minced
- 1 cup heavy cream
- 1/2 cup shredded mozzarella cheese
- 2 tbsp butter
- 1 tbsp olive oil
- 1 tsp Italian seasoning
- Salt and pepper to taste
- Fresh parsley for garnish (optional)
Instructions
- Cook the bowtie pasta in well-salted boiling water until al dente, about 9 minutes. Drain and set aside.
- While the pasta cooks, heat olive oil in a skillet over medium-high heat. Season chicken breasts with salt, pepper, and Italian seasoning.
- Cook chicken for 6-7 minutes per side until golden brown and cooked through (internal temperature of 165°F). Let rest for a few minutes before slicing.
- In the same skillet, melt butter over medium-low heat. Add minced garlic and sauté for 30 seconds until fragrant.
- Pour in heavy cream and bring to a simmer. Gradually whisk in parmesan cheese until melted and smooth. Stir in mozzarella cheese until fully melted.
- Add the drained pasta and sliced chicken to the skillet with the sauce. Toss everything together until the pasta and chicken are well coated.
- Taste and adjust seasoning if needed. Garnish with fresh parsley if desired. Serve immediately.
Notes
- For a spicier kick, add a pinch of red pepper flakes to the sauce.
- Substitute half-and-half for heavy cream for a lighter sauce.
- Leftovers can be stored in an airtight container in the refrigerator for up to 3 days.
Nutrition
- Serving Size: 1 plate
- Calories: 520
- Sugar: 3g
- Sodium: 450mg
- Fat: 28g
- Saturated Fat: 15g
- Unsaturated Fat: 10g
- Trans Fat: 0g
- Carbohydrates: 38g
- Fiber: 2g
- Protein: 32g
- Cholesterol: 135mg


Leave a Reply