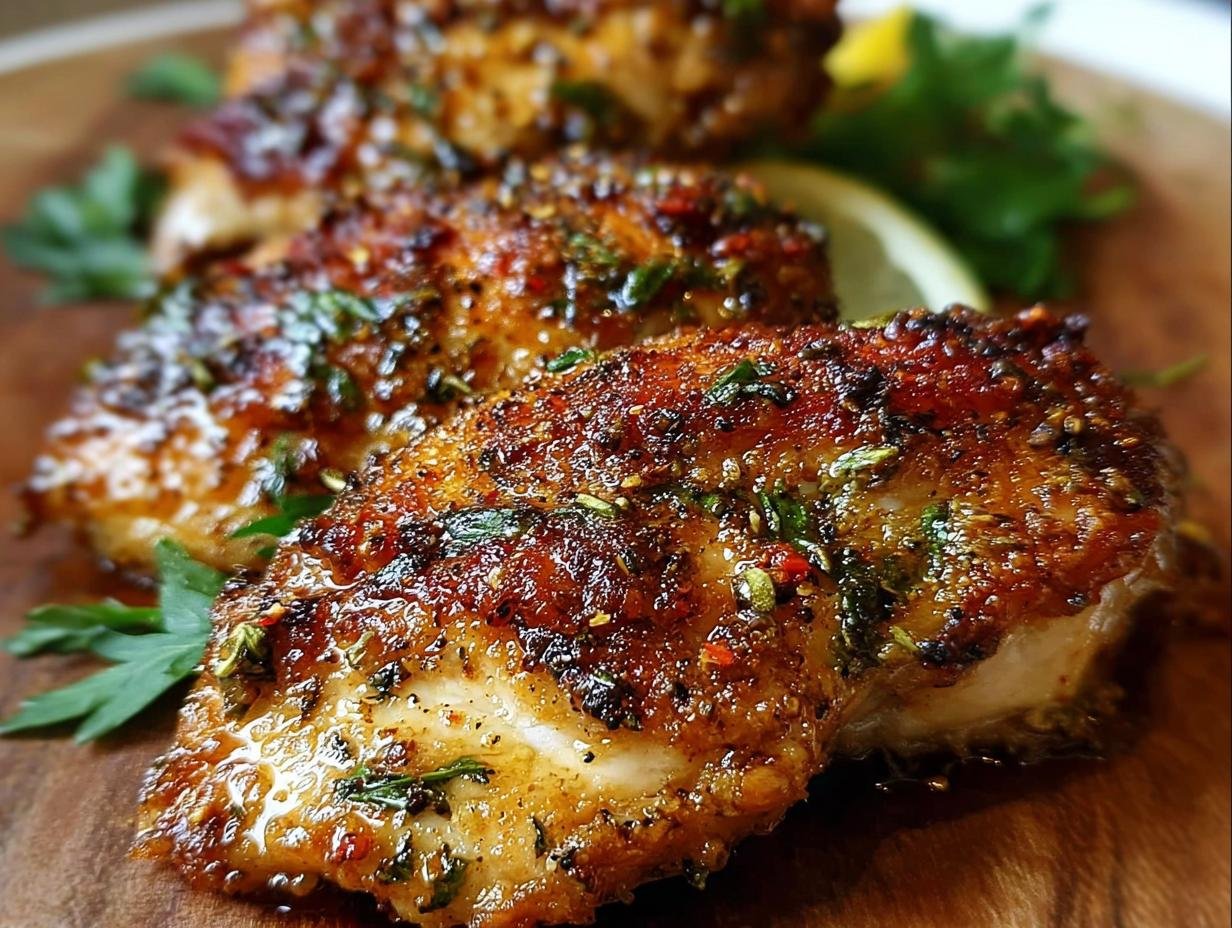
Melt Mouth Chicken has been my culinary obsession for years, and I can finally share my secrets with you! I still remember the first time I successfully pulled off this dish – the aroma of garlic and spices filled my kitchen, and the chicken was so incredibly tender it literally dissolved on my tongue. It’s not just a meal; it’s an experience. If you’re looking for a truly unforgettable, juicy chicken dish that’s surprisingly simple to make, you’ve come to the right place. Get ready to impress yourself and everyone you cook for. Let’s get cooking this melt in your mouth chicken recipe!
Why You’ll Love This Melt Mouth Chicken Guide
This isn’t just another chicken recipe; it’s your ticket to culinary success! You’ll adore how incredibly easy it is to achieve that perfect, melt-in-your-mouth texture. Here’s why this guide will become your go-to:
- Achieve unbelievably tender chicken every single time.
- Impress your family and friends with a restaurant-quality dish.
- This is a truly tender chicken recipe for melting in your mouth that works like magic.
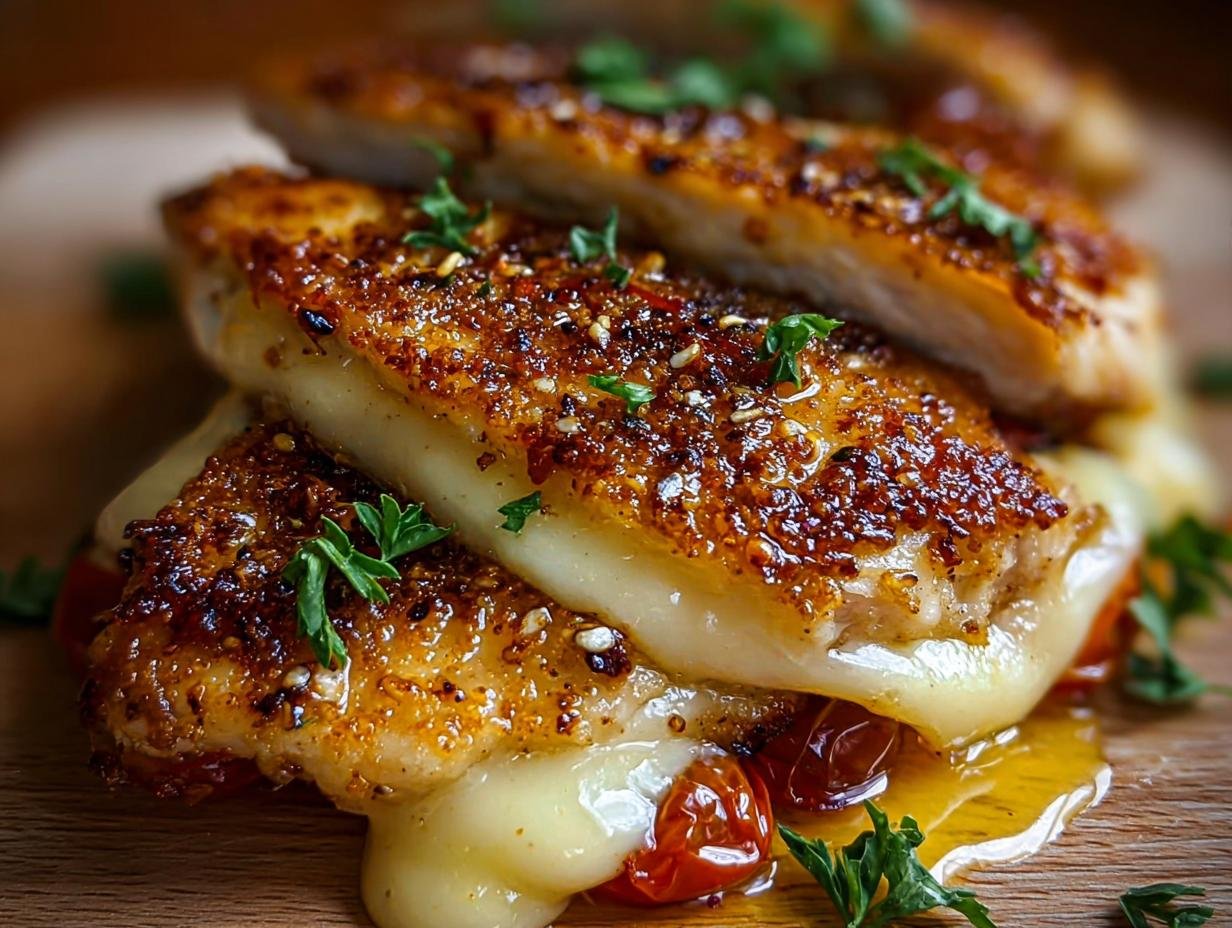
- Enjoy a crispy coating that perfectly complements the juicy interior.
- Spend less time in the kitchen and more time savoring the delicious results.
- Discover why this is the ultimate tender chicken recipe for melting in your mouth.
- Perfect for beginners thanks to its straightforward instructions.
- It’s a versatile dish that pairs wonderfully with countless sides.
Ingredients for Melt Mouth Chicken
Gathering these simple ingredients is the first step in our melt in your mouth chicken preparation guide. You’ll be amazed at how humble items transform into something so spectacular!
- 1 whole chicken (about 3-4 pounds), cut into 8 pieces – This is the star! Make sure it’s cut into manageable pieces for even cooking.
- 1 cup all-purpose flour – Our base for that irresistible crispy coating.
- 1 teaspoon salt – Essential for flavor and helps create that perfect crust.
- 1/2 teaspoon black pepper – A classic pairing with salt for a little kick.
- 1/2 teaspoon paprika – Adds a beautiful color and a subtle smoky depth.
- 1/4 teaspoon garlic powder – For that savory, aromatic punch we all love.
- 1/4 teaspoon onion powder – Enhances the overall savory profile of the chicken.
- 1/2 teaspoon cayenne pepper (optional) – Use this if you like a hint of heat.
- 1/2 cup buttermilk – This is a secret weapon! Its acidity tenderizes the chicken, making it extra moist and helping the coating adhere.
- 2 large eggs, lightly beaten – They create a sticky base for the flour mixture to cling to.
- Vegetable oil, for frying – You’ll need enough to come about 2 inches up the side of your pan.
- Salt and pepper, for seasoning after frying – A final touch to make the flavors pop.
How to Make Melt Mouth Chicken
Now for the fun part! These steps are designed to give you the best melt in your mouth chicken instructions, ensuring a perfect crispy exterior and incredibly juicy interior. Follow along, and you’ll have amazing chicken in no time.
- Step 1: Begin by patting your chicken pieces thoroughly dry with paper towels. This crucial step helps the coating adhere better and ensures a crispier finish.
- Step 2: In a large bowl, create your dry dredge. Whisk together the all-purpose flour, 1 teaspoon salt, 1/2 teaspoon black pepper, 1/2 teaspoon paprika, 1/4 teaspoon garlic powder, 1/4 teaspoon onion powder, and 1/2 teaspoon cayenne pepper if you’re using it for a little heat.
- Step 3: In a separate shallow dish, whisk together the 1/2 cup buttermilk and the 2 large eggs. This wet mixture is key to tenderizing the chicken and making the flour stick.
- Step 4: Now, it’s time to coat the chicken. Dredge each chicken piece generously in the flour mixture, ensuring it’s fully covered. Then, dip it into the buttermilk mixture, letting any excess drip off. Finally, coat it once more in the flour mixture, pressing gently to help it adhere. This double-coating ensures maximum crispiness.
- Step 5: Place your beautifully coated chicken pieces on a wire rack set over a baking sheet. Let them rest for about 10 minutes. This allows the coating to set, further preventing it from falling off during frying.
- Step 6: Pour about 2 inches of vegetable oil into a large, heavy-bottomed skillet or Dutch oven. We’re aiming for a temperature that will fry the chicken quickly and evenly.
- Step 7: Heat the oil over medium-high heat until it reaches around 350°F (175°C). You can test this by dropping a tiny piece of batter into the oil; it should sizzle immediately. Getting the oil temperature right is one of the secrets to the best melt in your mouth chicken instructions.
- Step 8: Carefully add the chicken pieces to the hot oil, being sure not to overcrowd the pan. Fry in batches for about 6-8 minutes per side, or until the chicken is a deep golden brown and cooked through. The kitchen will smell amazing!
- Step 9: Once cooked, remove the chicken from the oil using tongs and place it back on the wire rack to drain off any excess oil. This keeps the coating wonderfully crisp.
- Step 10: Let the chicken rest for 5-10 minutes before serving. This allows the juices to redistribute, making sure your chicken is incredibly moist and tender – truly the mark of melt in your mouth chicken.
- Step 11: Season generously with additional salt and pepper to taste right after frying, enhancing all those delicious flavors.
Melt Mouth Chicken Cooking Tips
Want to elevate your chicken game? These pro tips will ensure your Melt Mouth Chicken is always a showstopper. They’re simple tweaks that make a huge difference in achieving that perfect texture and flavor.
- Always use buttermilk for the wet dredge; its acidity is key to tenderizing the meat and creating a superior coating.
- Don’t overcrowd the pan when frying. Cooking in batches ensures the oil temperature stays consistent, leading to crispier chicken.
- Patting the chicken completely dry before dredging is non-negotiable for a truly crispy crust.
- Allow the coated chicken to rest on a wire rack for at least 10 minutes before frying to help the coating adhere better.
What’s the secret to perfect Melt Mouth Chicken?
The magic truly happens with the buttermilk soak and proper dredging. This combination is what makes chicken melt in your mouth by tenderizing the meat and creating an irresistible crispy exterior. For more on the science of cooking, check out The Science of Cooking.
Can I make Melt Mouth Chicken ahead of time?
You can prep the chicken by coating it and refrigerating it on a wire rack for up to 2 hours before frying. For longer storage, it’s best to cook it fresh.
How do I avoid common mistakes with Melt Mouth Chicken?
To avoid soggy chicken, ensure your oil is hot enough and don’t overcrowd the pan. If your chicken isn’t melt-in-your-mouth tender, it might be overcooked or you skipped the buttermilk soak, which is why my chicken is not melt in your mouth. For tips on proper cooking temperatures, consult FoodSafety.gov.
Best Ways to Serve Melt Mouth Chicken
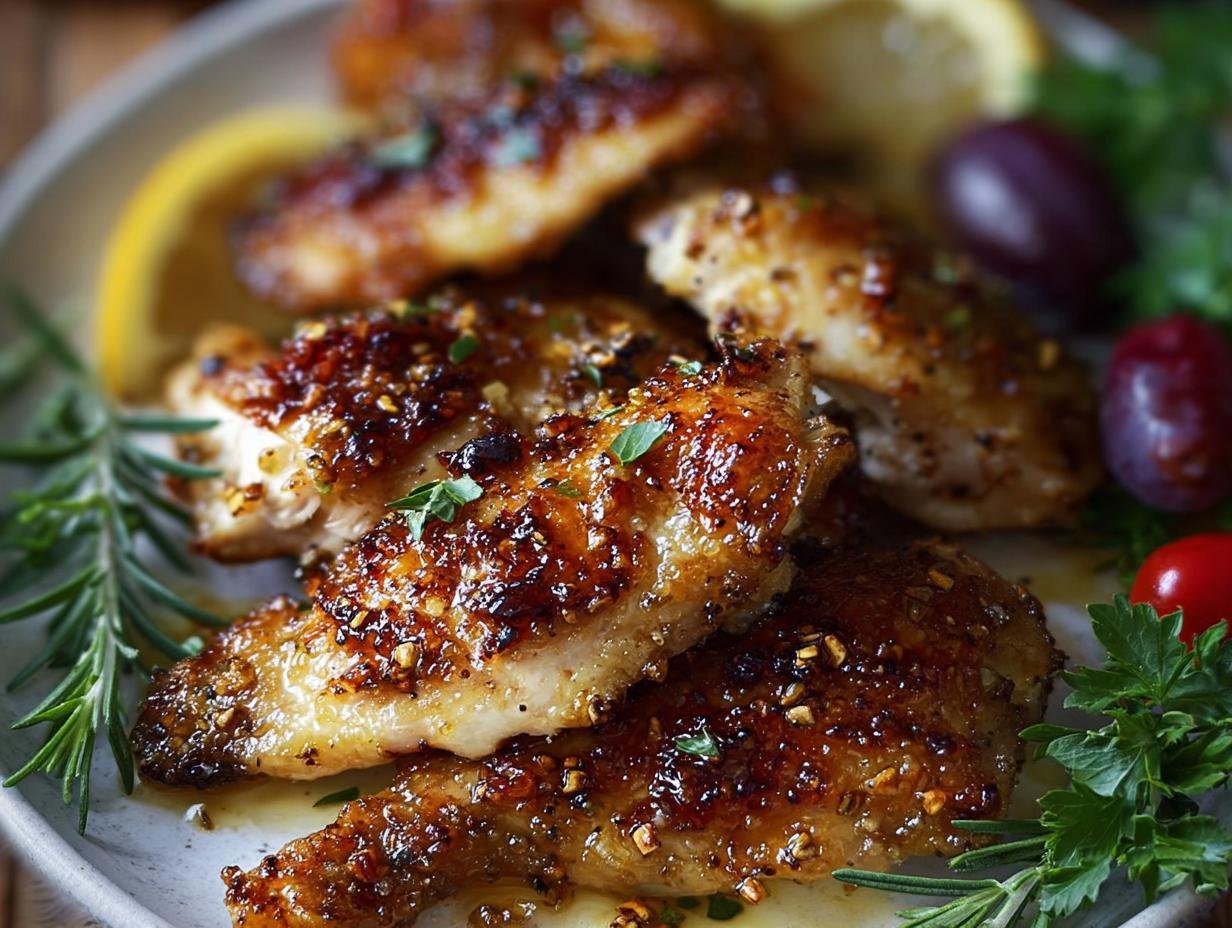
This incredible chicken is so versatile, it’s perfect for any meal! For a classic comfort food experience, I love serving it alongside creamy mashed potatoes and a crisp, tangy coleslaw. The richness of the chicken pairs beautifully with these sides. If you’re feeling a bit more indulgent, consider a decadent melt in your mouth chicken recipe with creamy sauce or a savory gravy spooned generously over the top. It also makes a fantastic centerpiece for a family dinner, perhaps with some potato salad and cornbread to round out the meal.
Nutrition Facts for Melt Mouth Chicken
When you make this melt in your mouth chicken recipe, you’re in for a treat that’s surprisingly balanced. Here’s a general idea of what you can expect per serving (which is about 1/8th of the chicken):
- Calories: 450
- Fat: 28g
- Saturated Fat: 7g
- Protein: 35g
- Carbohydrates: 15g
- Fiber: 1g
- Sugar: 1g
- Sodium: 650mg
Nutritional values are estimates and may vary based on specific ingredients used and exact portion sizes.
How to Store and Reheat Melt Mouth Chicken
Even though this chicken is so good you’ll want to eat it all in one sitting, knowing how to store and reheat it makes it an easy melt in your mouth chicken option for busy weeknights. Once your delicious chicken has cooled completely to room temperature, transfer any leftovers to an airtight container. Properly stored, it will keep well in the refrigerator for 3 to 4 days. If you want to stash some away for later, it freezes beautifully! Wrap individual pieces tightly in plastic wrap, then in aluminum foil, and store them in your freezer for up to 3 months. Just remember to thaw it overnight in the fridge before reheating.
When it’s time to enjoy your leftovers, there are a couple of great ways to reheat this Melt Mouth Chicken. For the crispiest results, I recommend placing the chicken on a baking sheet in a preheated oven at 375°F (190°C) for about 10-15 minutes, or until heated through. If you’re short on time, the microwave works too, though the coating might not be as crispy. Just heat on medium power in short bursts, checking frequently to avoid drying it out. Either way, you’ll get that tender, juicy chicken experience again!
Frequently Asked Questions About Melt Mouth Chicken
Can I use chicken thighs or breasts instead of a whole chicken?
Absolutely! You can adapt this recipe for chicken thighs or breasts. For thighs, reduce the frying time to about 5-7 minutes per side. Breasts may cook slightly faster, so keep a close eye on them to prevent overcooking. This adaptability is part of what makes it an ultimate melt in your mouth chicken option for any cut.
What kind of oil is best for frying?
Vegetable oil is a great all-around choice because it has a high smoke point and is neutral in flavor. Canola oil or peanut oil are also excellent options for achieving that perfect crispy exterior. The key is to ensure the oil is hot enough (around 350°F/175°C) before adding the chicken. For more on cooking oils, see The American Heart Association’s guide to fats and oils.
My chicken coating fell off. What did I do wrong?
This usually happens if the chicken wasn’t patted dry enough, or if the oil wasn’t hot enough when the chicken was added. Also, overcrowding the pan can cause the coating to steam rather than crisp, leading to detachment. Ensure you’re following the melt in your mouth chicken preparation guide steps carefully, especially regarding dryness and oil temperature.
How can I make the chicken spicier?
For a spicier kick, increase the amount of cayenne pepper in your flour dredge. You could also add a pinch of chili powder or a dash of hot sauce to the buttermilk mixture. Experimenting with these additions is part of what makes this an ultimate melt in your mouth chicken recipe that you can customize to your taste!
Variations of Melt Mouth Chicken You Can Try
Once you’ve mastered the classic, you’ll want to explore the wonderful melt in your mouth chicken variations! These ideas will help you discover new flavor profiles and cooking methods to keep things exciting. The melt in your mouth chicken flavor secrets are all about playing with spices and techniques.
- Spicy Cajun Kick: Add smoked paprika, cayenne, garlic powder, onion powder, and a pinch of dried thyme and oregano to your flour mixture. This gives it a bold, fiery flavor.
- Lemon Herb Delight: Incorporate finely chopped fresh rosemary and thyme into the flour dredge, and add a tablespoon of lemon zest. This offers a bright, aromatic twist.
- Oven-Baked for Less Fuss: If you prefer not to fry, try this! After coating the chicken, place it on a wire rack set over a baking sheet and bake at 400°F (200°C) for 35-45 minutes, flipping halfway through, until golden and cooked through. It’s a simpler way to get a similar tender result.
- Gluten-Free Option: Swap the all-purpose flour for a good quality gluten-free all-purpose baking blend. Ensure it contains xanthan gum for binding. The texture might vary slightly, but it’s a great alternative for dietary needs.
Melt Mouth Chicken Guide: Amazing 1 Step Recipe

A guide to making incredibly tender and juicy chicken that melts in your mouth, featuring a crispy coating and simple preparation steps. This versatile recipe is perfect for any occasion.
- Prep Time: 20 minutes
- Cook Time: 24-32 minutes
- Total Time: 44-52 minutes
- Yield: 8 servings 1x
- Category: Dinner
- Method: Frying
- Cuisine: American
- Diet: Vegetarian
Ingredients
- 1 whole chicken (about 3–4 pounds), cut into 8 pieces
- 1 cup all-purpose flour
- 1 teaspoon salt
- 1/2 teaspoon black pepper
- 1/2 teaspoon paprika
- 1/4 teaspoon garlic powder
- 1/4 teaspoon onion powder
- 1/2 teaspoon cayenne pepper (optional)
- 1/2 cup buttermilk
- 2 large eggs, lightly beaten
- Vegetable oil, for frying
- Salt and pepper, for seasoning after frying
Instructions
- Pat chicken pieces dry with paper towels.
- In a large bowl, whisk together flour, salt, pepper, paprika, garlic powder, onion powder, and cayenne pepper (if using).
- In a separate shallow dish, whisk together buttermilk and eggs.
- Dredge each chicken piece in the flour mixture, then dip in the buttermilk mixture, and coat again with flour, pressing gently.
- Set coated chicken aside on a wire rack.
- Pour vegetable oil (about 2 inches deep) into a large, heavy-bottomed skillet or Dutch oven.
- Heat oil over medium-high heat until a small piece of chicken batter sizzles immediately (around 350°F/175°C).
- Carefully fry chicken in batches, 6-8 minutes per side, until golden brown and cooked through.
- Remove chicken from oil and place on a wire rack to drain excess oil.
- Let chicken rest for 5-10 minutes.
- Season with salt and pepper to taste.
Notes
- For extra crispy skin, bake fried chicken at 350°F (175°C) for 10-15 minutes after frying.
- Serving Suggestions: Mashed potatoes, coleslaw, potato salad, dipping sauces.
- Storage: Refrigerate leftovers in an airtight container for up to 3 days. Reheat in oven or microwave.
- Variations: Experiment with different herbs and spices in the flour mixture (thyme, rosemary, oregano). Use peanut or canola oil for frying.
- Troubleshooting: If chicken isn’t crispy, oil may not have been hot enough or pan was overcrowded. If chicken is dry, it may have been overcooked. Adjust cooking time and oil temperature accordingly.
Nutrition
- Serving Size: 1/8th of chicken


Leave a Reply