
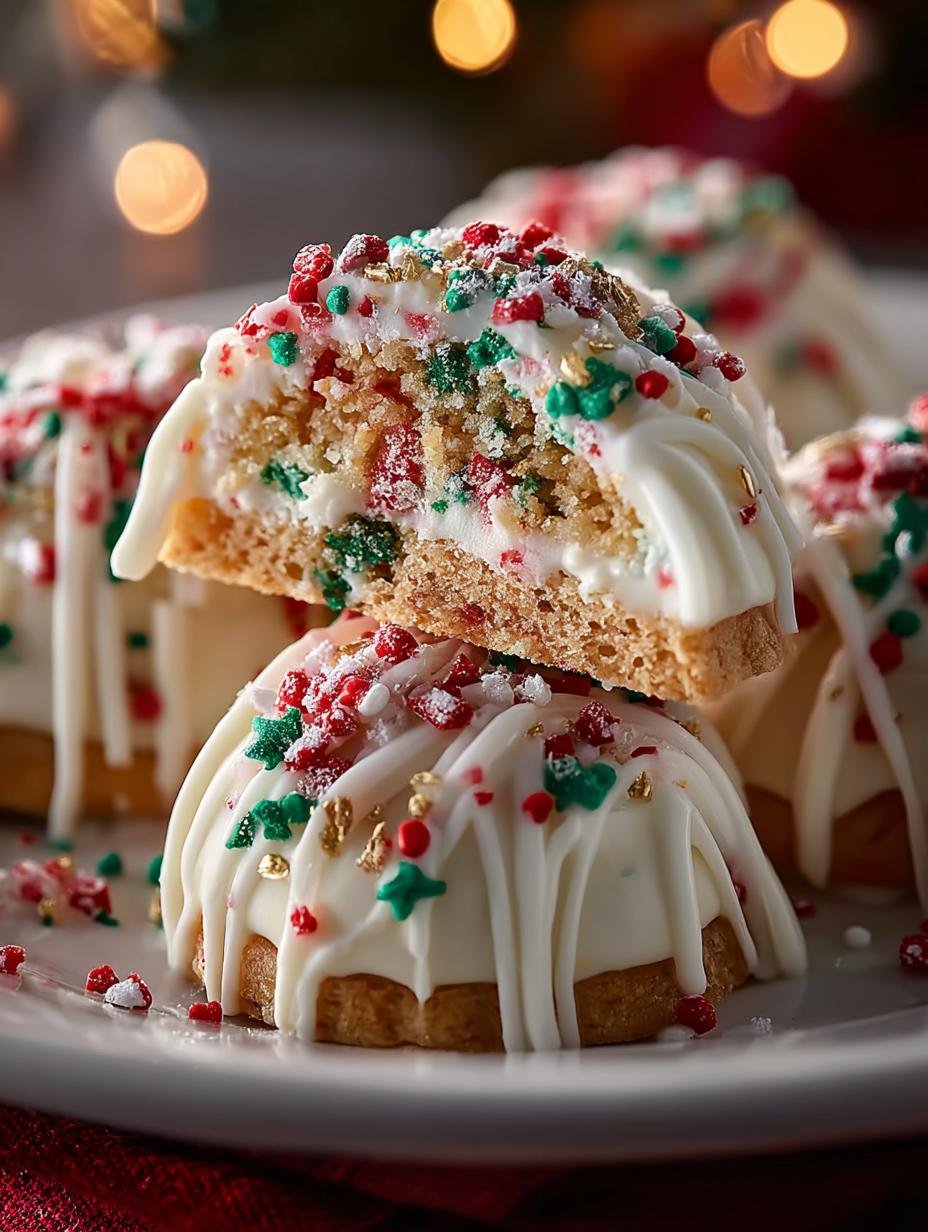
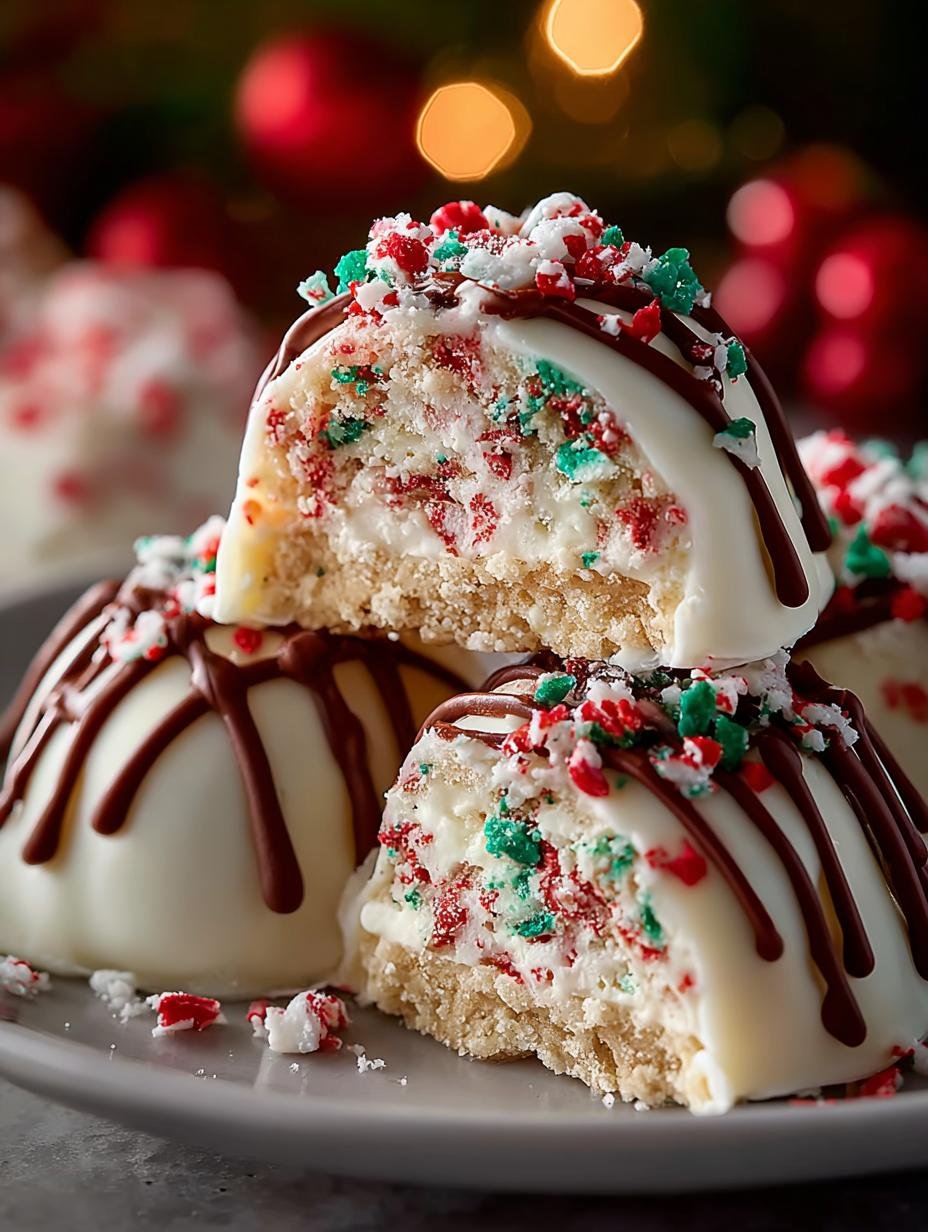
Little Debbie Christmas Tree treats are a nostalgic staple during the holiday season, and transforming them into elegant truffles is a delightful way to celebrate. This no-bake recipe captures all the festive magic and iconic flavors of the beloved Little Debbie Christmas Snack Cake, making it an ideal choice for holiday parties or as sweet edible gifts. Each bite is a perfect blend of cake and frosting, coated in creamy white chocolate, adorned with festive sprinkles, and served as an irresistible Christmas dessert.
Why You’ll Love This Little Debbie Christmas Tree
There are countless reasons to love these truffles! First, they are incredibly easy to make, requiring no baking, which saves time during the busy holiday season. Second, they are perfect for any festive gathering, adding a touch of elegance to your dessert table. Third, these truffles are remarkably versatile, allowing you to customize flavors and decorations. Fourth, they capture the nostalgic taste of Little Debbie Christmas Tree Cakes, making them a hit with both kids and adults. Additionally, they make for excellent gifts when packaged nicely. Lastly, they are vegetarian-friendly, accommodating various dietary preferences. With all these benefits, you’ll see why these Little Debbie Christmas Tree Cakes truffles are a must-try!
Ingredients for Little Debbie Christmas Tree
Gather these items:
- 1 box Little Debbie Christmas Tree Cakes (5 cakes)
- 8 ounces white chocolate or candy melts
- 3 tablespoons Festive sprinkles
- 3 tablespoons Red candy melts (for drizzling, optional)
- Green sanding sugar for decoration
How to Make Little Debbie Christmas Tree Step-by-Step
- Step 1: Unwrap all 5 Little Debbie Christmas Tree Cakes. Crumble them finely into a large mixing bowl, using your hands to integrate the cake with its inherent frosting until a cohesive mixture forms.
- Step 2: Cover the bowl tightly with plastic wrap and chill the cake mixture in the refrigerator for at least 30 minutes to firm up.
- Step 3: Line a baking sheet with parchment paper. Using a small cookie scoop (1-1.5 tbsp), scoop out portions of the chilled mixture. Roll each portion between your palms to form smooth, compact balls. Place them onto the prepared baking sheet.
- Step 4: Chill the formed truffles on the baking sheet in the refrigerator for 1-2 hours, or in the freezer for 15-20 minutes, until they are very firm.
- Step 5: While truffles chill, melt 8 ounces of white candy melts or good quality white chocolate chips. Use a microwave (30-sec intervals, stirring thoroughly after each) or a double boiler until completely smooth. If using white chocolate chips and it’s too thick, add 1-2 teaspoons of coconut oil or vegetable shortening.
- Step 6: Remove a few chilled truffles at a time. Using a dipping tool or forks, submerge each truffle in the melted white chocolate. Lift, gently tap off excess chocolate, and immediately transfer to the parchment-lined baking sheet. While the coating is still wet and tacky, generously sprinkle with festive sprinkles and green sanding sugar. Repeat for all truffles, working quickly.
- Step 7: Once the white chocolate coating has set on the truffles, if desired, melt the 3 tablespoons of red candy melts. Drizzle artistic patterns over the truffles for an extra festive touch.
- Step 8: Return the decorated truffles to the refrigerator for a final chill of 30-60 minutes until the chocolate coating is fully set and firm to the touch.
- Step 9: Serve these delightful truffles chilled or at a cool room temperature. Store any leftovers in an airtight container in the refrigerator for up to 1-2 weeks. For longer storage, truffles can be frozen for up to 1 month; thaw overnight in the refrigerator before serving.
Pro Tips for the Best Little Debbie Christmas Tree
Keep these in mind:
- Ensure the chocolate is completely melted for a smooth coating.
- Use different colored sprinkles for variety to match your holiday theme.
- Consider drizzling with additional white or milk chocolate for a luxurious touch.
Best Ways to Serve Little Debbie Christmas Tree
These truffles are perfect for any occasion. Serve them as a sweet treat at holiday parties or package them as gifts for friends and family. They also make an excellent addition to a dessert platter alongside other Little Debbie holiday snacks or festive desserts. Don’t forget to include a few in your holiday cookie boxes!
How to Store and Reheat Little Debbie Christmas Tree
Store any leftovers in an airtight container in the refrigerator for up to 1-2 weeks. For longer storage, truffles can be frozen for up to 1 month; thaw overnight in the refrigerator before serving. This makes them an excellent option for meal prep during the hectic holiday season.
Frequently Asked Questions About Little Debbie Christmas Tree
What’s the secret to perfect Little Debbie Christmas Tree?
The secret to perfect truffles is ensuring the cake and frosting mixture is well-chilled before forming them into balls. This helps them hold their shape during dipping. Use high-quality chocolate for coating to enhance the overall flavor.
Can I make Little Debbie Christmas Tree ahead of time?
Absolutely! These truffles can be prepared in advance. Just store them in the refrigerator or freezer until you’re ready to serve. They taste great even after a few days!
How do I avoid common mistakes with Little Debbie Christmas Tree?
To avoid common mistakes, ensure your truffles are fully chilled before dipping in chocolate, and don’t rush the melting process. Take your time to achieve a smooth chocolate coating, which makes all the difference in presentation and taste.
Variations of Little Debbie Christmas Tree You Can Try
Experiment with different flavors by incorporating additional ingredients into the mixture, such as crushed peppermint or flavored extracts like almond or vanilla. You can also use dark chocolate for coating or try different types of sprinkles to create unique variations of these festive treats suitable for your dietary preferences.
{
“@context”: “https://schema.org”,
“@type”: “ImageObject”,
“contentUrl”: “https://quizsavor.com/wp-content/uploads/2025/12/Little-Debbie-Christmas-Tree-1.jpg”,
“thumbnail”: “https://quizsavor.com/wp-content/uploads/2025/12/Little-Debbie-Christmas-Tree-1.jpg”,
“description”: “Little Debbie Christmas Tree Cakes Truffles: A Festive Delight – Little Debbie Christmas Tree – main visual representation”,
“name”: “Little Debbie Christmas Tree Recipe Image”,
“uploadDate”: “2023-10-01”,
“width”: “1200”,
“height”: “630”
}
Little Debbie Christmas Tree Cakes Truffles: A Festive Delight

Transform beloved Little Debbie Christmas Tree Cakes into elegant, bite-sized truffles. This no-bake recipe captures all the festive magic and nostalgic flavor of the iconic snack cakes, perfect for holiday parties or sweet edible gifts.
- Prep Time: 2 hours
- Cook Time: 45 minutes
- Total Time: 2 hours 45 minutes
- Yield: 20 truffles 1x
- Category: Dessert
- Method: No-bake
- Cuisine: American
- Diet: Vegetarian
Ingredients
- 1 box Little Debbie Christmas Tree Cakes (5 cakes)
- 8 ounces white chocolate or candy melts
- 3 tablespoons Festive sprinkles
- 3 tablespoons Red candy melts (for drizzling, optional)
- Green sanding sugar for decoration
Instructions
- Unwrap all 5 Little Debbie Christmas Tree Cakes. Crumble them finely into a large mixing bowl, using your hands to integrate the cake with its inherent frosting until a cohesive mixture forms.
- Cover the bowl tightly with plastic wrap and chill the cake mixture in the refrigerator for at least 30 minutes to firm up.
- Line a baking sheet with parchment paper. Using a small cookie scoop (1-1.5 tbsp), scoop out portions of the chilled mixture. Roll each portion between your palms to form smooth, compact balls. Place them onto the prepared baking sheet.
- Chill the formed truffles on the baking sheet in the refrigerator for 1-2 hours, or in the freezer for 15-20 minutes, until they are very firm.
- While truffles chill, melt 8 ounces of white candy melts or good quality white chocolate chips. Use a microwave (30-sec intervals, stirring thoroughly after each) or a double boiler until completely smooth. If using white chocolate chips and it’s too thick, add 1-2 teaspoons of coconut oil or vegetable shortening.
- Remove a few chilled truffles at a time. Using a dipping tool or forks, submerge each truffle in the melted white chocolate. Lift, gently tap off excess chocolate, and immediately transfer to the parchment-lined baking sheet. While the coating is still wet and tacky, generously sprinkle with festive sprinkles and green sanding sugar. Repeat for all truffles, working quickly.
- Once the white chocolate coating has set on the truffles, if desired, melt the 3 tablespoons of red candy melts. Drizzle artistic patterns over the truffles for an extra festive touch.
- Return the decorated truffles to the refrigerator for a final chill of 30-60 minutes until the chocolate coating is fully set and firm to the touch.
- Serve these delightful truffles chilled or at a cool room temperature. Store any leftovers in an airtight container in the refrigerator for up to 1-2 weeks. For longer storage, truffles can be frozen for up to 1 month; thaw overnight in the refrigerator before serving.
Notes
- Ensure the chocolate is completely melted for a smooth coating.
- Use different colored sprinkles for variety.
Nutrition
- Serving Size: 1 truffle
- Calories: 120
- Sugar: 10g
- Sodium: 15mg
- Fat: 7g
- Saturated Fat: 4g
- Unsaturated Fat: 2g
- Trans Fat: 0g
- Carbohydrates: 14g
- Fiber: 0g
- Protein: 1g
- Cholesterol: 5mg


Leave a Reply