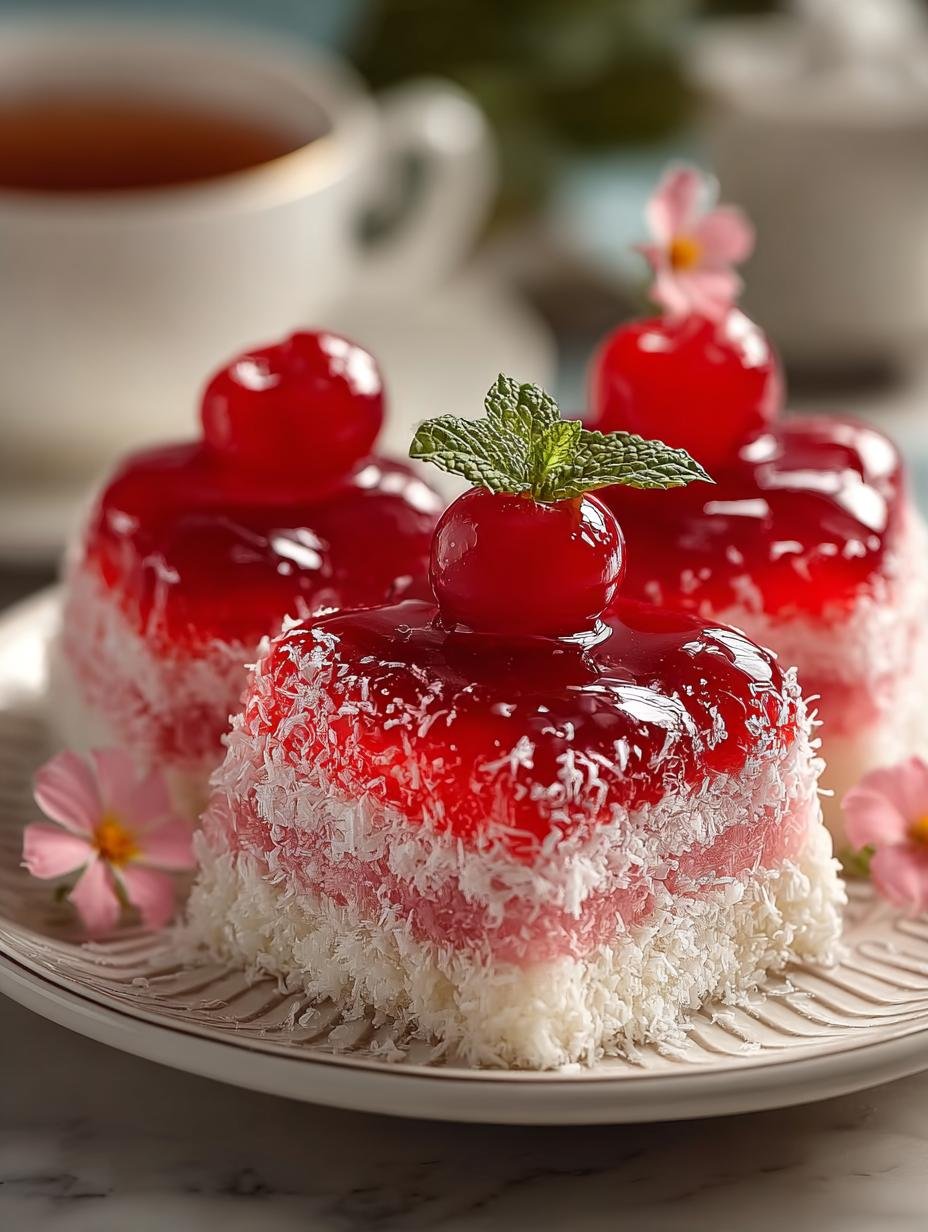
Old Fashioned Pink Jelly is a delightful treat that brings back fond memories of simpler times. This delicious dessert features layers of fluffy sponge cake paired with sweet raspberry or strawberry jelly, making it a perfect addition to any gathering. Whether you’re hosting a party or simply indulging in a nostalgic dessert, learning how to make this classic pink jelly will surely impress your guests.
Why You’ll Love This Old Fashioned Pink Jelly
There are many reasons to love this traditional pink jelly. First, it is incredibly easy to make, with just a handful of ingredients. Second, it has a nostalgic charm that evokes fond memories of childhood. The homemade pink jelly recipe is versatile; you can use it in various desserts or simply spread it on toast. Additionally, this recipe is vegetarian-friendly, making it suitable for various diets. If you’re wondering what is Old Fashioned Pink Jelly, it’s a sweet treat that can bring smiles to everyone’s faces. Plus, it is a great way to use seasonal fruits, giving it a fresh twist!
Ingredients for Old Fashioned Pink Jelly
Gather these items:
- 2 cups all-purpose flour
- 1 ½ teaspoons baking powder
- pinch of salt
- 1 cup unsalted butter
- 1 ½ cups granulated sugar
- 3 large eggs
- 1 cup whole milk
- raspberry or strawberry jelly
How to Make Old Fashioned Pink Jelly Step-by-Step
- Step 1: Preheat your oven to 350°F (175°C). Grease and line your cake pans with parchment paper.
- Step 2: In a large bowl, whisk together 2 cups of all-purpose flour, 1 ½ teaspoons of baking powder, and a pinch of salt. Set this mixture aside.
- Step 3: In another bowl, cream together 1 cup of unsalted butter and 1 ½ cups of granulated sugar until light and fluffy, about 3-5 minutes.
- Step 4: Add in 3 large eggs, one at a time, mixing well after each addition. Scrape down the sides of the bowl as needed.
- Step 5: Gradually add the dry mixture to the butter mixture, alternating with 1 cup of whole milk. Start and end with the flour mixture, mixing until just combined.
- Step 6: Divide the batter evenly between the prepared cake pans. Smooth the tops with a spatula.
- Step 7: Bake in the preheated oven for 25-30 minutes, or until a toothpick inserted in the center comes out clean. Allow the cakes to cool in the pans for 10 minutes before transferring them to a wire rack to cool completely.
- Step 8: Once the cakes are cool, spread a generous layer of raspberry or strawberry jelly between the layers of cake. Optionally, spread jelly on the sides and top of the cake.
- Step 9: Optionally, dust the top with powdered sugar or decorate with fresh berries.
Pro Tips for the Best Old Fashioned Pink Jelly
Keep these in mind:
- Perfect for any occasion.
- Great for gatherings where you want to impress.
- Can use different types of jelly to suit your taste.
- For a more fruity flavor, consider adding small pieces of fruit to the jelly layers.
Best Ways to Serve Old Fashioned Pink Jelly
This delightful dessert can be served in various ways. Spread it generously on toast for a sweet breakfast or brunch treat. You can also slice it into individual servings and serve it at parties or gatherings. For a retro pink jelly dessert, consider layering it with whipped cream or custard. Another fun option is to use it as a filling for pastries or tarts, allowing its sweet flavor to shine.
How to Store and Reheat Old Fashioned Pink Jelly
Once you have made your best old fashioned pink jelly recipe, you can store it covered in the refrigerator for up to a week. If you plan to make it ahead of time, just remember to assemble it shortly before serving to maintain the freshness of the cake layers. For meal prep, you can bake the cake layers and prepare the jelly separately, combining them closer to serving time.
Frequently Asked Questions About Old Fashioned Pink Jelly
What’s the secret to perfect Old Fashioned Pink Jelly?
The key to making perfect old-fashioned raspberry jelly lies in using high-quality ingredients, especially fresh fruit for the jelly. Ensure the cake layers are well-baked and cooled before assembly to prevent sogginess.
Can I make Old Fashioned Pink Jelly ahead of time?
Yes, you can prepare the cake layers and jelly in advance. Just assemble the cake shortly before serving for the best freshness. This makes it an excellent option for parties.
How do I avoid common mistakes with Old Fashioned Pink Jelly?
To avoid common mistakes, make sure to measure your ingredients accurately and follow the baking times. Also, let the cake layers cool fully before adding the jelly to prevent it from melting.
Variations of Old Fashioned Pink Jelly You Can Try
Feel free to experiment with your old fashioned pink jelly variations. Use different types of fruit jelly, such as peach or apricot, for a unique flavor twist. You can also add layers of fresh fruit between the cake and jelly for added texture. For those looking for a decadent treat, try adding a layer of cream cheese frosting in between the cake and jelly.
For more delicious dessert ideas, check out our dessert recipes. If you’re interested in using seasonal fruits, learn more about growing your own fruits. And for a delightful breakfast option, try our easy avocado toast recipe.
PrintOld Fashioned Pink Jelly: 7 Sweet Ways to Enjoy

Delicious Old Fashioned Pink Jelly Cakes Recipe to Try Today!
- Prep Time: 15 minutes
- Cook Time: 30 minutes
- Total Time: 45 minutes
- Yield: 12 servings 1x
- Category: Dessert
- Method: Baking
- Cuisine: American
- Diet: Vegetarian
Ingredients
- 2 cups all-purpose flour
- 1 ½ teaspoons baking powder
- pinch of salt
- 1 cup unsalted butter
- 1 ½ cups granulated sugar
- 3 large eggs
- 1 cup whole milk
- raspberry or strawberry jelly
Instructions
- Preheat your oven to 350°F (175°C). Grease and line your cake pans with parchment paper.
- In a large bowl, whisk together 2 cups of all-purpose flour, 1 ½ teaspoons of baking powder, and a pinch of salt. Set this mixture aside.
- In another bowl, cream together 1 cup of unsalted butter and 1 ½ cups of granulated sugar until light and fluffy, about 3-5 minutes.
- Add in 3 large eggs, one at a time, mixing well after each addition. Scrape down the sides of the bowl as needed.
- Gradually add the dry mixture to the butter mixture, alternating with 1 cup of whole milk. Start and end with the flour mixture, mixing until just combined.
- Divide the batter evenly between the prepared cake pans. Smooth the tops with a spatula.
- Bake in the preheated oven for 25-30 minutes, or until a toothpick inserted in the center comes out clean. Allow the cakes to cool in the pans for 10 minutes before transferring them to a wire rack to cool completely.
- Once the cakes are cool, spread a generous layer of raspberry or strawberry jelly between the layers of cake. Optionally, spread jelly on the sides and top of the cake.
- Optionally, dust the top with powdered sugar or decorate with fresh berries.
Notes
- Perfect for any occasion
- Great for gatherings
- Can use different types of jelly
Nutrition
- Serving Size: 1 slice
- Calories: 300
- Sugar: 20 g
- Sodium: 150 mg
- Fat: 15 g
- Saturated Fat: 9 g
- Unsaturated Fat: 5 g
- Trans Fat: 0 g
- Carbohydrates: 40 g
- Fiber: 1 g
- Protein: 3 g
- Cholesterol: 70 mg


Leave a Reply